Friday, July 17, 2009

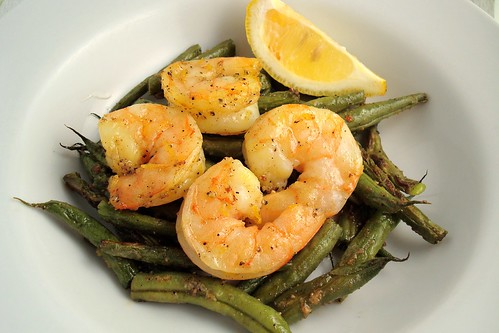
Spicy Roasted Green Beans and Shrimp

Spicy Roasted Green Beans and Shrimp

Despite my recent postings of decadent treats, I actually have been eating some healthy things in between. This recipe is fairly quick so even if it is super hot, you can turn on your oven quickly to make this dish and hopefully your space will have cooled down enough by the time you're done eating. I love the flavor of roasted vegetables and green beans combined with these spices is a real winner. If you're sensitive to heat, just use a little bit less of the Aleppo or cayenne, but don't skip it completely because it adds a nice depth. The lemon adds a burst of freshness. This is a great recipe to have on hand if you're looking for a great dinner and the leftovers hold up well for lunch the next day.


Spicy Roasted Green Beans and Shrimp
(As found on Kalyn's Kitchen)

Makes 2 servings

For the beans:
1 pound green beans trimmed and cut into bite-sized pieces
1 1/2 tablespoons olive oil
1/2 teaspoon ground coriander
1/2 teaspoon ground cumin
1/2 teaspoon salt
1/2 teaspoon fresh ground black pepper
1/8 teaspoon Aleppo Pepper (cayenne or red pepper flakes also work)

For the shrimp:
3/4 pound medium-large raw shrimp
1 1/2 tablespoons olive oil
Zest from one lemon (save the lemon and cut into fourths)
1/2 teaspoon salt
1/2 teaspoon fresh ground black pepper

Preheat oven to 425 degrees.

Trim beans and cut into bite sized pieces. Put beans in a bowl and toss with olive oil, coriander, cumin, salt, black pepper, and Aleppo pepper.

Peel shrimp and place in another bowl with olive oil, lemon zest, salt, and black pepper.

Spray roasting pan with olive oil or non-stick spray, then arrange beans on pan in a single layer. Roast beans 10 minutes, stirring once about half-way through. After 10 minutes, arrange shrimp on top of beans and roast 5-8 minutes more, until shrimp are done but still tender and juicy.

Squeeze the four lemon quarters over the shrimp and beans and serve immediately.

Printable Recipe

Stumble Upon Toolbar

Thursday, July 16, 2009

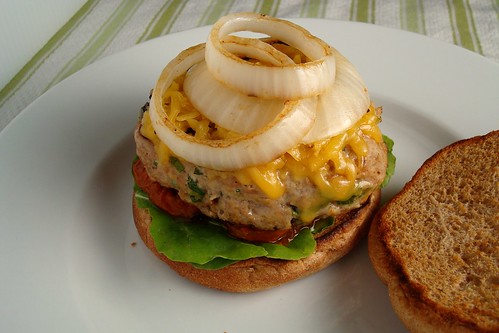
Turkey Burgers with Smoked Gouda and Grilled Onions

Turkey Burgers with Smoked Gouda and Grilled Onions

I'm still hard at work clearing out my freezer with each passing day. Recently I found some ground turkey and the last few remaining slow roasted tomatoes (can you believe it?). I really got a lot of mileage out of the tomatoes. I will have to try that technique again soon as tomatoes are starting to pop up at the farmers market. In my most recent cookbook sweep, I found the recipe for Martha's favorite turkey burgers. Since her beef burgers rocked my world a few months ago, I decided to try the turkey burger. They were so good, easy to make and quite fast too! Rather than mix gruyere into the turkey mixture, I topped the burgers with some smoked Gouda. While the burgers were cooking up, I grilled some onions as a topper. I cooked these on the grill pan since I am waiting until after my move to really start proper grilling. The finishing touch was a bit of arugula and the pepper leaves were great with the flavors of the burger.


Favorite Turkey Burgers
(Adapted from Everyday Food: Great Food Fast)

Makes 2 burgers

3/4 pound ground turkey (93% lean)
2 scallions, thinly sliced
2 tablespoons dried breadcrumbs
2 tablespoons Dijon mustard
1 garlic clove, minced
1/2 teaspoon salt
1/2 teaspoon pepper
Hamburger buns
Shredded smoked Gouda
Slow-roasted tomatoes
Arugula
Grilled onions

Heat the grill to high. In a medium bowl, use a fork to gently combine the turkey with the scallions, breadcrumbs, Dijon, garlic, salt, and pepper. Dive the mixture evenly and gently form it into 1-inch patties.

Lightly oil the grill. Place the patties on the hottest part of the grill; sear until browned, 1-2 minutes per side. Move the patties to the cooler part of the grill; continue grilling until cooked through 5-10 minutes per side.

Split the burger buns and toast on the grill if you like; place a burger on each bun and tip with the desired accompaniments.

Printable Recipe

Stumble Upon Toolbar

Wednesday, July 15, 2009

Vanilla Bean Sugar Cookies

Vanilla Bean Sugar Cookie

I recently mentioned how it has definitely become more fun to bake now that I have more people with which to share my baked goods. Unfortunately, my baking cravings have struck in the middle of summer and it's freaking hot and who really feels like turning on an oven in this weather? For me, the solution has apparently become baking at midnight. After a lazy Saturday of not doing much more than a little party planning and Harry Potter watching, I got the bright idea to bake something. I didn't care that it was midnight or that I had better things to do like script coverage, I wanted to cream butter and sugar and create something wonderful. I recently came across this recipe and bookmarked it because it used ingredients I always have on hand. Even getting the butter to room temperature was easy because of a little trick I learned of placing the butter on the overhang of my (ancient) preheating oven and rotating it every once in a while. These cookies take no time to make and even less time to be devoured. The scent of vanilla has quickly become one of my favorite baking smells (next to cinnamon) and there is vanilla in every bite from the full bean used in the batter to the sprinkling of vanilla sugar on top of the cookies. If you ever find yourself with an extra vanilla bean, I highly recommend placing it in a bit of granulated sugar for as long as you can. Vanilla sugar is amazing on practically any baked good. I loved these soft, buttery cookies and my coworkers seemed to enjoy them as well. If you decide to make them, I would skip the refrigerating/freezing step suggested in the original recipe as I didn't find it necessary and the cookies still came out great!

Today is my Thursday...looking forward to a long weekend with family and friends...what do you have planned?


Vanilla Sugar Cookies
(As found on Joy the Baker)

Makes 1 dozen 2-inch cookies

1/2 cup (1 stick) unsalted butter, at room temperature
1/2 cup canola oil
1/2 cup granulated sugar, plus additional for sugaring tops (I used vanilla sugar for the tops)
1/2 cup powdered sugar
1 large egg
Seeds of 1 vanilla bean
2 cups all-purpose flour
1/2 teaspoon baking soda
1/4 teaspoon salt

Preheat the oven to 350 degrees. Line baking sheet with parchment paper, or foil, or grease generously with butter or cooking spray.

Using a mixer fitted with a paddle attachment, beat the butter in a large bowl on medium speed for about 1 minute. Add the vegetable oil. It may not fully incorporate with the butter, but that is fine. Add the granulated sugar, powdered sugar, egg and vanilla, beating on medium speed until each ingredient is completely incorporated.

Stir in the flour, baking soda and salt all at once using a wooden spoon or the mixer set on low. The dough will be soft.

For large cookies, dollop 2 tablespoons of cookie dough onto the cookie sheet about 2 inches apart. For smaller cookies use 1 tablespoon for each cookie. Press the dough evenly with your fingers or palm to 1/4-inch thickness. Generously sprinkle vanilla sugar (or granulated sugar) on top of the cookie dough.

Bake for 12 to 14 minutes for larger cookies or 8 to 10 minutes for smaller cookies. Let the cookies cool on the baking sheet for at least 10 minutes before transferring to racks to cool completely. The cookies will keep for up to 3 days if stored in an airtight container.

Printable Recipe

Stumble Upon Toolbar

Monday, July 13, 2009

Baked Corn Dogs

Baked Corn Dogs

Do you ever get those random cravings for foods you know you shouldn't be eating? Well normally when I get those cravings, I try and find a healthier way to satisfy them. This past week I have been amused reading the comments in Jezebel's Do You Have a Secret Culinary Life post. It is definitely comforting to know I am not the only one with questionable culinary habits when I am not cooking up something to share on this site. A lot of the comments mentioned hot dogs which of course got me craving hot dogs. I remembered these baked corn dogs I saw on Big Red Kitchen and Vanilla Sugar. I have been trying to organize/clean out my pantry in preparation for a party AND a move (busy month) and I found this box of corn muffin mix that I never used from a while back. These take about two minutes to mix together and will definitely satisfy any naughty cravings you may be having in a slightly healthier way.

Baked Corn Dogs
(Adapted from Big Red Kitchen and Vanilla Sugar)

Makes 3 servings

1-8.5 ounce package cornbread mix
1 egg
1/3 cup milk (I used skim)
1/4 cup shredded cheese
3 hot dogs
Ketchup and mustard for serving

Preheat the oven to 400 degrees and lightly grease an 8x8 baking dish.

In a large bowl, mix together the cornbread mix, egg, milk and cheese and spread evenly in the baking dish. Place the hot dogs an inch or two apart in the pan. Bake 15-20 minutes until the cornbread is cooked through. Cool for a bit then use a sharp knife to cut around each hot dog, making sure it is surrounded by cornbread.

Printable Recipe

Stumble Upon Toolbar

Saturday, July 11, 2009

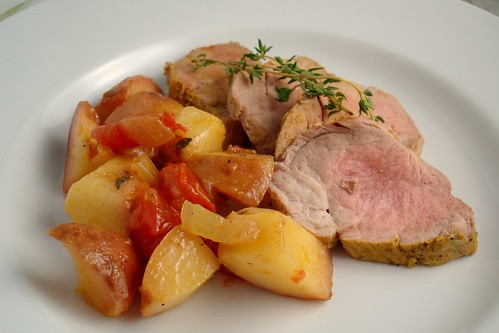
Pork Tenderloin with Tomato-Peach Compote

Pork Tenderloin with Tomato-Peach Compote

This past weekend at the farmers market I picked up some peaches, but they started to go bad almost immediately. I won't bad mouth the farm because I do get some other stuff from them that is awesome. However I was looking for something good to use them up in. On Twitter, I got many suggestions for peach pie, but I wasn't really in a pie mood this week. I had one tomato left from a panzanella I made last weekend so I decided to make this recipe from the most recent Gourmet. Instead of using curry, I used a Vadouvan spice I got in my sample pack from The Spice House. I was a little dubious about the curry flavors working well with the garlic and ginger as well as the tomato and peach, but they ended up being a great combination! There is a gentle heat in the pork rub that works well with the sweetness of the tomato and peach compote. I also think that the spice in this dish would work well with a number of fruity flavors so this is definitely something to play around with a bit.

How's your weekend going? Hope it's as long and relaxing as mine ;)


Pork Tenderloin with Tomato-Peach Compote
(Adapted from Gourmet, July 2009)

Makes 2-4 servings

3 garlic cloves, grated
1 1/2 teaspoons grated ginger
Salt and pepper
1 (3/4-pound) pork tenderloin
1 tablespoon vegetable oil
1/2 medium onion, chopped
1 tomato, seeded and chopped
2 small peaches, chopped
1 teaspoon chopped thyme
Pinch sugar (optional)

Preheat oven to 425 degrees with rack in middle.

Mix together the garlic, ginger, curry powder, 1/2 teaspoon salt, and 1/4 teaspoon pepper to a paste using mortar and pestle. Rub all over pork.

Heat oil in an ovenproof 12-inch heavy skillet over medium-high heat until it shimmers. Brown pork on one side, about 5 minutes, then turn over and transfer skillet to oven. Roast until an instant-read thermometer inserted into thickest part of meat registers 145 to 150 degrees for juicy meat, 10 to 12 minutes. Let pork rest, uncovered, on a cutting board while making compote.

Add onion to skillet (handle will be very hot) and saute over medium-high heat until softened, 5 to 7 minutes. Add tomatoes and peach and saute until just softened, 3 to 4 minutes. Stir in thyme and, if desired, sugar.

Slice pork and serve with compote.

Printable Recipe

Stumble Upon Toolbar

Friday, July 10, 2009

Cantaloupe Sorbet

Cantaloupe Sorbet

Well it seems summer is in full swing and there is no better place highlighting the tastes of summer than the farmers market. I have definitely had my fill of berries and cherries and even a few peaches, but I was super excited to pick up a cantaloupe this week. I can seriously eat a whole cantaloupe in one sitting by myself. Rather than showcase that particular talent on the site, I thought it would be fun to find an interesting recipe for it. We are definitely out of the June Gloom stage and temps are heating up! While it is still not as hot as it could be, I am definitely feeling sweatier these days. This sorbet is easy and take just a few minutes to whip together (minus freezing time). I loved this sorbet! It is just like eating frozen cantaloupe. I think next time I am going to reverse the amounts of vodka and lemon juice. You don't taste the vodka at all, it is purely for texture so if you don't drink, feel free to leave it out. I would have liked a bit more lemon to add a tart contrast to the sweet cantaloupe. The mint adds another degree of refreshing.

Cantaloupe Sorbet

Happiest of happy birthdays to my dear friend Tony aka writer of the most knowledgeable site about music. Do me a favor and head over to his site and wish him a happy birthday!

Cantaloupe Sorbet
(As found on Chaos In the Kitchen)

1 pound cantaloupe, cut into large chunks
100 grams (3.5 ounces or about 1/2 cup) sugar
2 soup spoons vodka
1 soup spoon fresh lemon juice
Mint leaves, cut in a chiffonade

Blitz the cantaloupe in the bowl of a food processor until it becomes a puree. In a large bowl, whisk together the puree, sugar, vodka, and lemon juice. Process in the ice cream maker according to manufacturer's instructions. Serve, topped with the mint.

Printable Recipe

Stumble Upon Toolbar

Monday, July 6, 2009

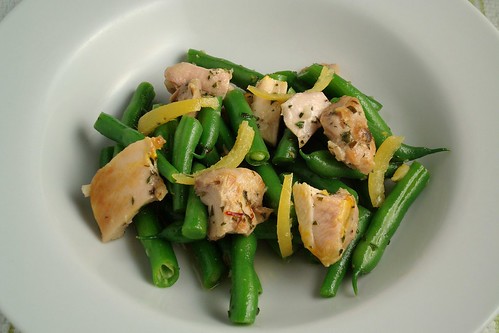
Saffron Chicken, Boiled Lemon and Green Bean Salad

Saffron Chicken

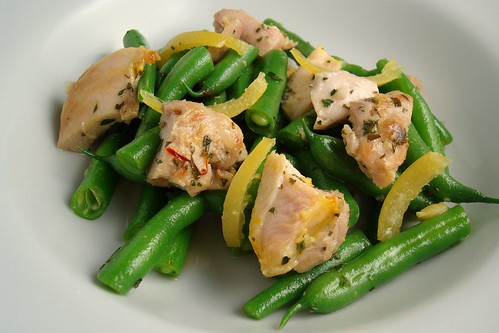
After all my naughtiness this weekend, I needed some food to bring me back to the right side of things. Actually, in terms of food, we weren't that bad at our barbecue. I discovered that I do enjoy grilled corn on the cob (especially if it is basted with Ponzu) and grassfed bison burgers are my new favorite food. However, tequila should not be consumed straight as if sipping on water. Before we headed out for all the merriment, I caught a repeat episode of Ellie Krieger's show. I tell ya, watching Food Net is almost painful these days so watching this show was like a breath of fresh air. Ellie may not have the most exciting personality, but she does have fantastic recipes. Once again the green beans were looking mighty fine at the farmers market today and since Raul is no longer able to gift me with lemons, I picked a bunch up at the market. The idea of boiling a lemon was a little strange to me, but I like how this recipe turned out although, I would have preferred a stronger punch from the saffron...maybe two pinches next time. The chicken marinade is very flavorful and it pairs well with the sweet dressing. The boiled lemon rind adds a nice tang with just a slight hint of bitterness that isn't at all unpleasant. I could have scarfed all of this down myself in one sitting, but I am giving half to my friend to prove that it IS possible for me to share the things I make.

Saffron Chicken, Boiled Lemon and Green Bean Salad

Saffron Chicken, Boiled Lemon and Green Bean Salad
(Adapted from Ellie Krieger)

Makes 2 servings

1 lemon, preferably unwaxed
1 1/4 teaspoons salt, plus more to taste, divided
Pinch saffron
1 tablespoon finely chopped mint leaves
2 cloves garlic, minced
1 tablespoon plus 1 1/2 teaspoons lemon juice, divided
Extra virgin olive oil
8 ounces boneless chicken thighs, pounded to 1/2-inch thick
8 ounces green beans, washed and trimmed
Cooking spray
1 tablespoon finely chopped fresh thyme leaves
1 tablespoon honey
Freshly ground black pepper

Prick the lemon in 3 or 4 places with a fork and place in a small pot with 1 teaspoon of salt and cover with water. Bring to a boil, cover and simmer for about 50 minutes or until the lemon is very tender. Drain and set aside to cool.

In the meantime, mix the saffron, mint, garlic, 1 1/2 teaspoons of lemon juice, 1 1/2 teaspoons of olive oil and 1/4 teaspoon of salt in a small bowl. Pour the marinade into a sealable plastic bag, add the chicken and let it marinate while you prepare the other ingredients.

Steam the green beans for 4 minutes and set aside to cool. Cut into 1/2-inch pieces.

Preheat a large skillet or grill pan which has been sprayed with cooking spray. Cook the chicken for 3 to 4 minutes on each side, or until cooked through. Set aside to cool. Cut into bite-sized chunks.

Slice the ends off of the lemon and slice it in half lengthwise. Scoop out the pulp. Slice the peel thinly and then again into 1/4-inch pieces.

In a large bowl, combine the chicken, lemon, green beans and thyme. In a small bowl combine the rest of the lemon juice and the honey, whisk in 1 tablespoon of olive oil, and season with salt and pepper, to taste. Pour the dressing over the salad and toss to combine.

Printable Recipe

Stumble Upon Toolbar

Sunday, July 5, 2009

Saffron Risotto with Grilled Shrimp

Saffron Risotto with Grilled Shrimp

As you may have been able to tell from my lack of posts lately, I have not been spending enough quality time in the kitchen. I hope to remedy that soon, but for the next week or two, posts may be scarce. However, having a long weekend has been wonderful and allowed me to spend a bit of time in the place I truly belong. Part of the problem has been that the income of this particular Hollywood assistant is slim to none, but yet surprisingly I found myself with all of the ingredients to make this recipe. It is super simple and the only thing it really requires is a bit of time for watching the risotto. The best part is that this reminds me of one of my favorite dishes I had while vacationing in Greece. On our last day at Panormos beach in Mykonos, a couple of us feasted on an amazing saffron risotto with seafood so I was super excited to be able to recreate this at home. If I close my eyes, I can just picture us at the amazing beach being conned out of all our Euros to buy some souvenirs for our friends ;) Seriously though, it was an amazing time and I hope to go back some day.

Saffron Risotto with Grilled Shrimp


Saffron Risotto with Grilled Shrimp
(Lightly adapted from Forking Delicious)

For the Risotto:
5 cups chicken stock (I used 4 cups of stock and 1 cup of water)
2 tablespoons Extra-Virgin olive oil
2 tablespoons unsalted butter
1/2 onion, minced
2 cloves garlic, minced
1 1/2 cups Arborio rice
2 pinches saffron threads
2/3 cup dry white wine
1/2 cup freshly grated Parmigiano-Reggiano
Kosher salt

For the shrimp:
Large shrimp, peeled and deveined, tails on if desired
Extra-virgin olive oil
Freshly squeezed lemon juice
Flat-leaf parsley, chopped
Salt and pepper

Preheat a grill or indoor grill pan to high.

Toss the shrimp with the oil and lemon juice and season with salt and pepper, set aside.

Heat chicken stock over medium-high heat until just simmering. In a large sauté pan, heat the olive oil and the butter over medium heat. Add the shallots and garlic and sweat until translucent, stirring constantly, about 3 minutes. Add the rice and saffron, turning to coat in the oil and sauté until the edges of the rice begin to look slightly translucent, about 2 minutes. Add the wine and cook until most of the liquid is absorbed and the pan is almost dry. Add one ladle-full of hot stock, stirring constantly until liquid is almost absorbed. Continue adding stock, one ladle at a time, stirring each addition until the liquid is almost absorbed, about 25 to 30 minutes total.

When the risotto is nearly done, toss the shrimp on the grill and sear until pink, opaque and curled in on themselves, about 2 minutes per side. Spritz the shrimp with more lemon juice when it comes off the grill. When the risotto is done, stir in the cheese and season with salt and pepper. To serve, ladle risotto into onto a plate or bowl and top with the shrimp and then the parsley.

Stumble Upon Toolbar

Friday, July 3, 2009

Daring Bakers: Bakewell Tart

Bakewell eh

The June Daring Bakers' challenge was hosted by Jasmine of Confessions of a Cardamom Addict and Annemarie of Ambrosia and Nectar. They chose a Traditional (UK) Bakewell Tart... er... pudding that was inspired by a rich baking history dating back to the 1800's in England.

Bakewell Tart

Last week I was so sure I wouldn't be able to get my June DB challenge done so I thought I would use it as one of my free passes to skip. However, having the day off today really made a difference in that plan. After a quick trip to the DMV this morning (which ended up being a lot less of a nightmare than I expected), I was ready to get to baking. This is actually a very easy recipe and quick! I love almonds, but I am not always a fan of almond flavoring so I just replaced almond extract with vanilla. I was all set to grind my own almonds, but then I realized I had some ground almonds left from making macarons. I used half the recipe and baked them in my muffin pan. I must admit, I was surprised by how much I enjoyed these little tarts. Hopefully my friends will enjoy them at our 4th of July barbecue tomorrow. Thanks to the hostesses for picking a great recipe. To see the other Daring Baker creations, visit here.

Bakewell Tart

Bakewell Tart

Makes 8 standard muffin sized tarts

One quantity sweet shortcrust pastry (recipe follows)
Bench flour
Jam or curd, warmed for spreadability if necessary
One quantity frangipane (recipe follows)
One handful blanched, flaked almonds

Assembling the tart:
Place the chilled dough disc on a lightly floured surface. If it's overly cold, you will need to let it become acclimatised for about 15 minutes before you roll it out. Flour the rolling pin and roll the pastry to 5mm (1/4”) thickness, by rolling in one direction only (start from the centre and roll away from you), and turning the disc a quarter turn after each roll. When the pastry is to the desired size and thickness, transfer it to the tart pan, press in and trim the excess dough. Patch any holes, fissures or tears with trimmed bits. Chill in the freezer for 15 minutes.

Preheat oven to 200C/400F.

Remove shell from freezer, spread as even a layer as you can of jam onto the pastry base. Top with frangipane, spreading to cover the entire surface of the tart. Smooth the top and pop into the oven for 30 minutes. Five minutes before the tart is done, the top will be poofy and brownish. Remove from oven and strew flaked almonds on top and return to the heat for the last five minutes of baking.

The finished tart will have a golden crust and the frangipane will be tanned, poofy and a bit spongy-looking. Remove from the oven and cool on the counter. Serve warm, with crème fraîche, whipped cream or custard sauce if you wish.

When you slice into the tart, the almond paste will be firm, but slightly squidgy and the crust should be crisp but not tough.

Sweet shortcrust pastry
Prep time: 15-20 minutes
Resting time: 30 minutes (minimum)
Equipment needed: bowls, box grater, cling film

4 ounces all purpose flour
.5 ounces sugar
1/4 teaspoon salt
2 ounces frozen unsalted butter
1 egg yolk
1/4 teaspoon vanilla extract
1-2 tablespoons ice cold water

Sift together flour, sugar and salt. Grate butter into the flour mixture, using the large hole-side of a box grater. Using your finger tips only, and working very quickly, rub the fat into the flour until the mixture resembles bread crumbs. Set aside.

Lightly beat the egg yolks with the vanilla extract and quickly mix into the flour mixture. Keep mixing while dribbling in the water, only adding enough to form a cohesive and slightly sticky dough.

Form the dough into a disc, wrap in cling and refrigerate for at least 30 minutes

Frangipane
Prep time: 10-15 minutes
Equipment needed: bowls, hand or stand mixer, rubber spatula

2.2 ounces unsalted butter, softened
2.2 ounces icing sugar
1 egg
1/4 teaspoon vanilla extract
2.2 ounces ground almonds
.5 ounce all purpose flour

Cream butter and sugar together for about a minute or until the mixture is primrose in colour and very fluffy. Scrape down the side of the bowl and add the egg, beating well after the addition. The batter may appear to curdle. In the words of Douglas Adams: Don’t panic. Really. It’ll be fine. Pour in the vanilla extract and mix for about another 30 seconds and scrape down the sides again. With the beaters on, spoon in the ground nuts and the flour. Mix well.

Printable Recipe

Bakewell Tart

Stumble Upon Toolbar

Thursday, July 2, 2009

Chicken and Blackberry Salad with Lemon Thyme Vinaigrette

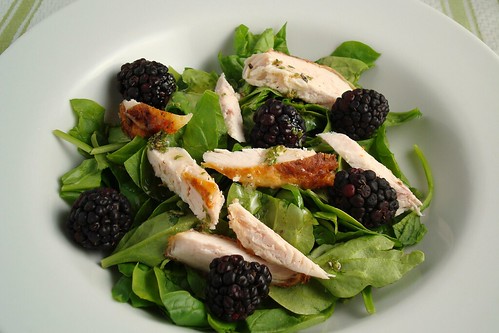
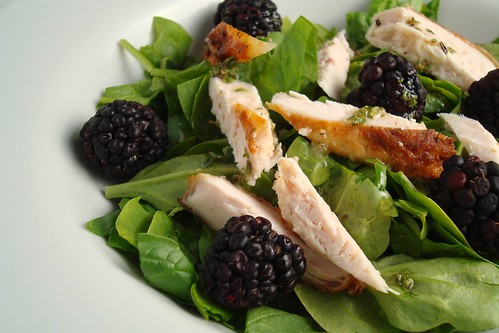
Chicken and Blackberry Salad

In anticipation of the long weekend and some changes coming up, I have been trying to keep my fridge a bit on the empty side. Of course it means I have less to post and I am eating some repeats, but hopefully I will have some fun things to share with you soon. I consider this recipe to be more of a suggestion than something you should strictly follow, but it worked really well for me yesterday. It is simple and makes the best of some great summer produce. It is so fast to make, you can literally put it together before you head out the door to work and have a great meal for a weekday lunch. I'm not going to lie, I used a store bought roasted chicken here because it is something that I can use to help put together a simple and delicious meal in a pinch.

I hope you have a nice long weekend filled with delicious eats. What are your plans for the holiday??


Chicken and Blackberry Salad


Chicken and Blackberry Salad with Lemon Thyme Vinaigrette
(By Esi)

Makes 1 serving

1-2 handfuls baby spinach, roughly chopped
Small handful blackberries
1 piece cold cooked chicken, roughly chopped
1 teaspoon extra-virgin olive oil
1 teaspoon fresh lemon juice
1/8 teaspoon fresh thyme, chopped
Salt and pepper to taste

In a small cup, whisk together the oil, lemon juice, thyme, and season with salt and pepper.

Fill a bowl with the spinach and top with the chicken and blackberries. Top the entire salad with the vinaigrette and toss to combine.

Printable Recipe

Stumble Upon Toolbar