
My brain has turned to mush this week. Pilot season has begun, I'm not sleeping enough, and I am chugging Emergen-C like frat boys chug beer in college so I don't get sick. My free time has become precious and when I have it, I want to do nothing except watch TV and eat pizza...so that's what I did last weekend...sort of. I always make and freeze extra pizza dough to have in case a craving strikes. There are so many ways to top a pizza, but I loved the simplicity of this. I am not big on the deli ham called for in the original recipe so I used prosciutto. This is such a simple recipe, it's hard to believe how tasty it is, but trust me. I couldn't get enough. In fact, since I only made half of the recipe below, I have enough of the ingredients to make it again this weekend...and maybe I will.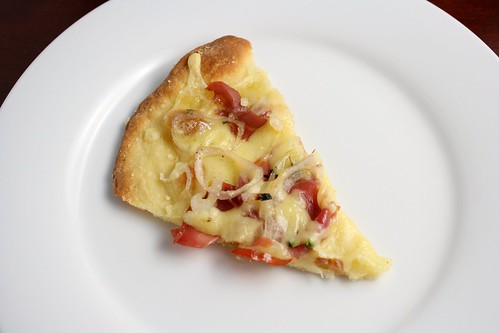
Prosciutto, Swiss, and Shallot Pizza
(Adapted from Real Simple)
Cornmeal for the pan
1 pound pizza dough, thawed if frozen
1 tablespoon plus 2 teaspoons olive oil
2 shallots, cut into thin rings and separated
12 sprigs fresh thyme
Kosher salt and black pepper
1/2 pound thinly sliced prosciutto
1/2 cup grated Swiss cheese (2 ounces)
Heat oven to 400 degrees. Sprinkle a rimmed baking sheet with the cornmeal. Shape the dough into a 14-inch circle and place on the prepared baking sheet.
Brush the dough with 1 tablespoon of the oil and bake until puffed and golden, 8 to 10 minutes.
Meanwhile, in a medium bowl, toss the shallots, thyme, two teaspoons of oil, and pinch each salt and pepper.
Top the partially cooked dough with the ham, shallot mixture, and cheese. Bake until the crust is crisp and the cheese has melted, 5 to 8 minutes.
Printable Recipe


