Tuesday, March 31, 2009

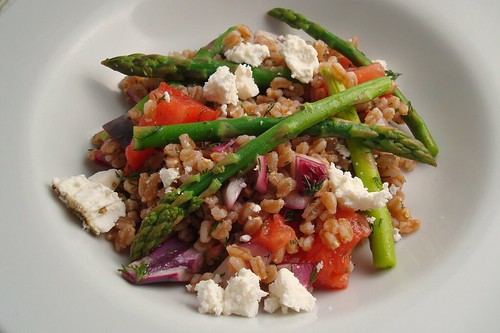
Farro Salad with Asparagus, Tomatoes, and Feta

Farro Salad with Asparagus, Tomatoes, and Feta

When looking for another tasty way to use farro, I came across this salad. The original recipe calls for snap peas, but last week when I made it there were no snap peas at the farmers market. Now the snap peas are back so I may have to make this again soon. It was delicious. Since my farro requires eight hours of soaking time before cooking, I set the farro in the bowl of water before work so that this meal came together quickly once I got home. I really enjoyed the dill dressing. Dill is one of those ingredients that I don't use often, but when I do, I am reminded of how much I like it. Maybe I should start picking up dill on a regular basis... Anyway, this is another one of those hearty salads that tastes great and keeps you full, but isn't bad for you either. I suggest you try it soon.


Farro Salad with Asparagus, Tomatoes, and Feta
(Adapted from Bon Appetit, June 2005)

Makes 2 servings

1/2 cup farro
1/2 bunch asparagus, trimmed, sliced
1 large tomato, seeded and chopped
1-2 tablespoons chopped red onion
1 tablespoon chopped fresh dill
1 tablespoon olive oil
1 tablespoon red wine vinegar
2 tablespoons feta cheese, crumbled

Cook farro in large saucepan of boiling salted water until just tender, about 10 minutes. Drain. Transfer to large bowl.

Meanwhile, cook asparagus in another saucepan of boiling salted water until crisp-tender, about 1-3 minutes. Drain. Add to farro with tomatoes, onion, and dill. Whisk oil and vinegar in small bowl. Season dressing with salt and pepper. Add dressing and feta to salad; toss to coat and serve.

Stumble Upon Toolbar

Monday, March 30, 2009

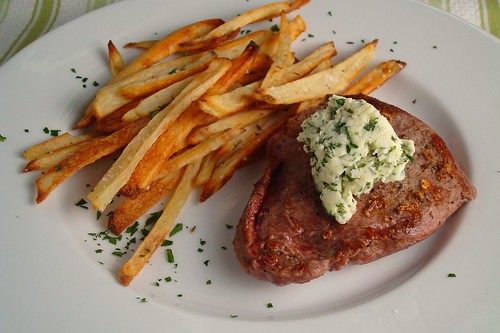
Steak "Frites"

Steak "Frites"

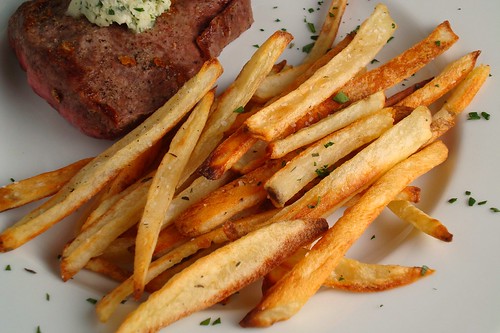
Since I have been eating a little better lately, I thought it would be nice to give myself a little treat. Last week hottie grassfed beef guy was at the farmers market and he sold me on some flat iron steak. I have never cooked with flat iron, but hottie (I promise to get his real name one of these days) suggested that since it is a tender cut, all it really needed was a little salt and pepper and a quick cook. When it came time to think about what to serve the steak with, I quickly remembered these oven fries I saw on Joy the Baker. It was the perfect way to use some of my herbes de Provence that I recently purchased from Cube. This was a fantastically delicious Sunday lunch and with a little planning, it didn't take too long to prepare. I did the butter first so that it would have time to set up, then I made the fries and when there were about ten minutes left, I cooked the steak. I tried to up the "restaurant quality" of the picture by sprinkling my plate with parsley...whadya think? Anyway, I absolutely loved this. The herbed butter was so good over the steak and the fries had a nice mellow flavor. It's safe to say I will be making all of these things again. Maybe as a seduction dinner (salad boy!). Ha!

Herbes de Provence Oven Fries

Compound Butter

4 tablespoons unsalted butter, at room temperature (can use salted butter) and cut into chunks
2 teaspoons fresh parsley, minced
1/2 teaspoon fresh thyme, minced
1/4 teaspoon kosher salt (if using salted butter, omit this)
1/2 teaspoon fresh lemon juice


In a small bowl, mix together the butter, parsley, thyme, and salt. Mix well and add the lemon juice. Mix again and place back in the refrigerator for the butter to harden.


Oven Baked Fries
(Adapted from Joy the Baker)

1 medium sized Russet potato, peeled
2 teaspoons extra-virgin olive oil
1 teaspoon Herbes de Provence
1/2 Kosher sea salt

Preheat oven to 400 degrees.

Line a baking sheet with foil and spray with cooking spray before you add the potatoes.

Slice cleaned potatoes lengthwise into 1/3-inch thick slices, then slice those slices into smaller potato strips. Place on the baking sheet and drizzle with olive oil. Toss the potatoes in the oil to coat. Place in oven for 25- 35 minutes, removing the tray every 10 minutes to toss and stir the potatoes, then returning to the oven. Cook until browned.

Remove from the oven and immediately add salt and Herbes de Provence. Toss and serve.


Steak

1 flat iron steak fillet (6 ounces)
Kosher salt and freshly ground black better

Heat a grill or grill pan over medium high heat. Season the steak liberally with salt and pepper. Cook the steak for about 4-5 minutes per side, or until the steak reaches your desired done-ness.

Stumble Upon Toolbar

Saturday, March 28, 2009

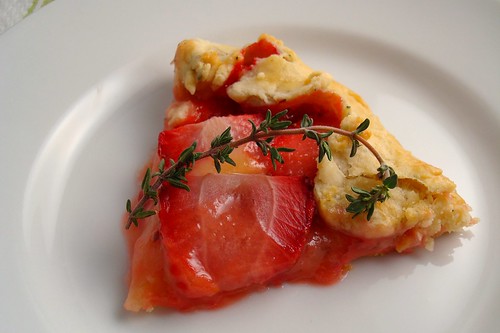
Strawberry Galette with Meyer Lemon Curd in Thyme Crust

Strawberry Galette

So, remember when I told you I did something cool with my lemon curd? Well here it is! As I have mentioned (bragged about) before, the spring produce here in So Cal is looking pretty amazing. Strawberries are kind of year round here, but they are becoming even more abundant and taste better than the ones you find in November. I absolutely love the combination of lemons and strawberries so my first idea was to do a strawberry galette and then drizzle it in the curd. I must admit, the combination of strawberries and thyme is not my own creation. A while ago I saw this recipe on Tartelette and the combo intrigued me. I have made a rosemary pie crust a few times and figured I could do the same thing with thyme. Instead of making just a strawberry galette and serving it with a glob of lemon curd, I spread a thin layer of curd on the bottom of the crust and topped it with a layer of strawberries. I can honestly say I gave myself a pat on the back after making this recipe. In my mind I thought the flavors would work really well together, and the reality was even better than I could have hoped for. The tart curd went just perfectly with the sweet strawberries and the slightly salty crust.

This experiment went better than I could have hoped for. I think it would make a great addition to a nice dinner or an Easter brunch...or a bridal shower, much like the one I am off to right now. Have a great Saturday!

Strawberry Galette Slice


Strawberry and Lemon Curd Galette in Thyme Crust
(By Esi)

1 thyme pate brisee (recipe follows)
Lemon curd
Strawberries, sliced 1/4 inch thick (I used almost a pint, may vary depending on the size of the strawberries)
1 tablespoon honey
1-2 teaspoons cornstarch
1 teaspoon fresh lemon juice
1 egg beaten with 1 tablespoon milk or water for egg wash

Preheat the oven to 400 degrees.

Mix the strawberries, cornstarch, honey, and lemon juice in a bowl and set aside.

Roll out the crust to about 1/4 inch thick and about 8 inches in diameter. Top with a few tablespoons of lemon curd. Placed the strawberries on top of the curd in an even layer, leaving a one inch ring around. Fold the edges of dough over the strawberries. Brush the dough with the egg wash and bake for 20-25 minutes until the crust is browned and the center is bubbling.

Thyme Pate Brisee
(By Esi)

1 1/4 cups all-purpose flour
1 teaspoon salt
2 teaspoons fresh thyme leaves
1 stick butter
2-4 tablespoons ice water


Mix the flour, salt, and thyme in a food processor. Add the butter and pulse until the mixture resembles coarse meal. With the motor running, add the ice water; process only enough to moisten the dough and have it just come together. Dump the dough out onto a floured board and knead quickly into a ball. Wrap the dough in plastic and allow it to rest in the refrigerator for 30 minutes to one hour.

Stumble Upon Toolbar

Friday, March 27, 2009

Daring Bakers: Lasagna

DB Lasagna

It's here! It's here, the March 2009 Daring Bakers Challenge is here!! Ok, I'm calm. That's just how I get at the beginning of each month when the new challenge is revealed.
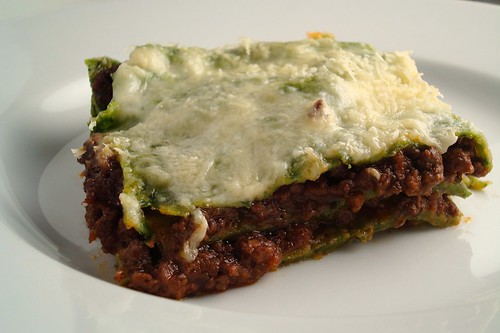
DB Lasagna

The March 2009 challenge is hosted by Mary of Beans and Caviar, Melinda of Melbourne Larder and Enza of Io Da Grande. They have chosen Lasagna of Emilia-Romagna from The Splendid Table by Lynne Rossetto Kasper as the challenge.
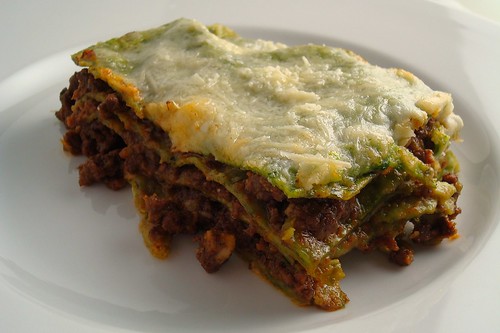
DB: Lasagna

This challenge caused a lot of debate among the Daring Bakers. I think it was mostly to do with the fact that when people think of DBers, they think of sweet creations. However, since I have joined, I have noticed an increasing number of savory challenges and have welcomed them. As much as I love sweets once in a while, I prefer savory dishes over sweets almost any time. Also, I was really excited about making a pasta sauce from scratch. All winter I craved standing over a stove and cooking something for hours. It's the kind of cooking I look forward to all winter, but unfortunately (fortunately?) living in Southern California, you don't get many opportunities for that type of cooking. I was perfectly happy standing over a stove for four hours watching my bolognese come together.

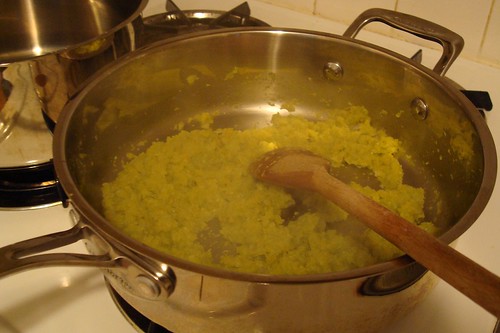
Green sludge aka future bolognese:
Bolognese

My pasta making work station:
My work station

I chose to do a bolognese because it was made mostly with ingredients I had on hand. I am not a huge fan of Anne Burrell...actually I don't like her at all. I just don't understand what she means "cook the crap" out of something and all her grunts and arm pumps make me tired. However, I have to admit, this sauce is really good...however there is one thing which I note below. Anne suggests tasting and salting the sauce each time you add water. I definitely agree with her about tasting, but the salt I just can't get on board with. Lucky for me, it was one of those rare times when I actually followed instructions and so each time I added water, I tasted the sauce. Besides the initial stages, I did not have to add more salt. Remember that Top Chef episode when Jamie got sent home for salty celery? I liken this sauce to that. Even though you are adding water every so often, the sauce is reducing and the flavors get more concentrated. All I am saying is salt with caution. Also, the first time I attempted the sauce, my base ingredients came out looking green and tasting green. I threw them out (ugh, such a waste) and started over (after a quick trip to the store). The ingredients still looked green, but didn't taste green so I kept going. The sauce was fantastic.

Spinach dough all wrapped up:
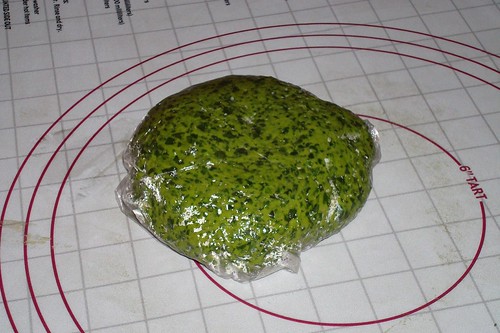
Spinach Dough

Bolognese after almost four hours of simmering:
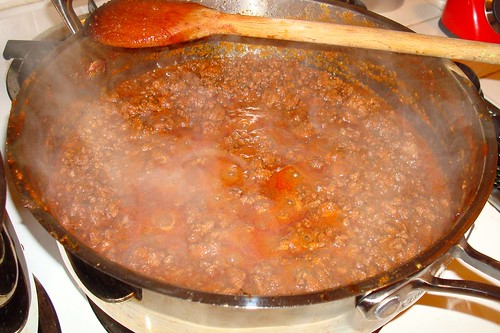
Bolognese

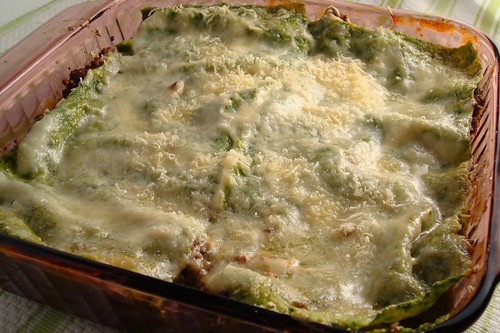
I thought the pasta came together quite easily. I was worried about rolling it thinly enough because I don't have a roller, but with some patience and a lot of space (my roommate was out of town), I got thin slices of noodles that I was happy with. I got four layers of lasagna for my 8x8 dish and still had some dough left over. I didn't really do anything creative with the leftover dough which is why you don't see it here. Even though it was a long process, this was one of my most fun challenges to date. I hope the other DBers had as good a time with it as I did and to see their creations visit the blogroll. Also, check out our new amazing site to find out how you can join the Daring Bakers or the new Daring Cooks!

Lasagna of Emilia-Romagna (Lasagna Verdi al Forno)
(Adapted from The Splendid Table: Recipes from Emilia-Romagna, the Heartland of Northern Italian Food)

Serves 4-6 main dish servings

Preparation Time: 15 minutes to assemble the lasgana and 40 minutes cooking time

1 recipe Spinach Pasta cut for lasagna (recipe follows)
1 recipe Bechamel Sauce (recipe follows)
1 recipe Bolognese sauce (recipe follows)
Freshly grated Parmigiano-Reggiano


Working Ahead:
The bolognese and the béchamel sauce can be made up to three days ahead. The bolognese can also be frozen for up to one month. The pasta can be rolled out, cut and dried up to 24 hours before cooking. The assembled lasagna can wait at room temperature (20 degrees Celsius/68 degrees Fahrenheit) about 1 hour before baking. Do not refrigerate it before baking, as the topping of béchamel and cheese will overcook by the time the center is hot.

Assembling the Ingredients:
Have all the sauces, rewarmed gently over a medium heat, and the pasta at hand. Have a large perforated skimmer and a large bowl of cold water next to the stove. Spread a double thickness of paper towels over a large counter space. Preheat the oven to 350 degrees Fahrenheit (180 degrees Celsius).

Cooking the Pasta:
Bring the salted water to a boil. Drop about four pieces of pasta in the water at a time. Cook about 2 minutes. If you are using dried pasta, cook about 4 minutes, taste, and cook longer if necessary. The pasta will continue cooking during baking, so make sure it is only barely tender. Lift the lasagna from the water with a skimmer, drain, and then slip into the bowl of cold water to stop cooking. When cool, lift out and dry on the paper towels. Repeat until all the pasta is cooked.

Assembling the Lasagna:
Spread a thin layer of béchamel over the bottom of the baking dish. Arrange a layer of overlapping sheets of pasta over the béchamel. Spread a thin layer of béchamel over the pasta, and then a thin layer of the bolognese. Top with another layer of pasta. Repeat the layers until all ingredients are used, finishing with béchamel sauce and topping with a generous dusting of Parmesan cheese.

Baking and Serving the Lasagna:
Cover the baking dish lightly with foil, taking care not to let it touch the top of the lasagna. Bake 40 minutes, or until almost heated through. Remove the foil and bake another 10 minutes, or until hot in the center (test by inserting a knife – if it comes out very warm, the dish is ready). Take care not to brown the cheese topping. It should be melted, creamy looking and barely tinged with a little gold. Turn off the oven, leave the door ajar and let the lasagna rest for about 10 minutes. Then serve.

Spinach Pasta

1 large egg
5 ounces fresh spinach, rinsed dry, and finely chopped
1 3/4 cups all-purpose flour

Equipment: A roomy work surface, any smooth surface will do, but marble cools dough slightly, making it less flexible than desired. A pastry scraper and a small wooden spoon for blending the dough. A wooden dowel-style rolling pin. Plastic wrap to wrap the resting dough and to cover rolled-out pasta waiting to be filled. It protects the pasta from drying out too quickly. A sharp chef’s knife for cutting pasta sheets. Cloth-covered chair backs, broom handles, or specially designed pasta racks found in cookware shops for draping the pasta. (I used plastic hangers)

Mound the flour in the center of your work surface and make a well in the middle. Add the egg and spinach. Use a wooden spoon to beat together the egg and spinach. Then gradually start incorporating shallow scrapings of flour from the sides of the well into the liquid. As you work more and more flour into the liquid, the well’s sides may collapse. Use a pastry scraper to keep the liquids from running off and to incorporate the last bits of flour into the dough. If the dough does not come together, add some room temperature water.

With the aid of the scraper to scoop up unruly pieces, start kneading the dough. Once it becomes a cohesive mass, use the scraper to remove any bits of hard flour on the work surface – these will make the dough lumpy. Knead the dough for about 3 minutes. Its consistency should be elastic and a little sticky. If it is too sticky to move easily, knead in a few more tablespoons of flour. Continue kneading about 10 minutes, or until the dough has become satiny, smooth, and very elastic. It will feel alive under your hands. Do not shortcut this step. Wrap the dough in plastic wrap, and let it relax at room temperature 30 minutes to 3 hours.

If using an extra-long rolling pin work with half the dough at a time. With a regular-length rolling pin, roll out a quarter of the dough at a time and keep the rest of the dough wrapped. Lightly sprinkle a large work surface with flour. The idea is to stretch the dough rather than press down and push it. Shape it into a ball and begin rolling out to form a circle, frequently turning the disc of dough a quarter turn. As it thins outs, start rolling the disc back on the pin a quarter of the way toward the center and stretching it gently sideways by running the palms of your hands over the rolled-up dough from the center of the pin outward. Unroll, turn the disc a quarter turn, and repeat. Do twice more.

Stretch and even out the center of the disc by rolling the dough a quarter of the way back on the pin. Then gently push the rolling pin away from you with one hand while holding the sheet in place on the work surface with the other hand. Repeat three more times, turning the dough a quarter turn each time.

Repeat the two processes as the disc becomes larger and thinner. The goal is a sheet of even thickness. For lasagna, the sheet should be so thin that you can clearly see your hand through it and see colors. Cut into rectangles about 4 by 8 inches (10 x 20 cm).

Dry the pasta at room temperature and store in a sealed container or bag if not using right away.

Bechamel

4 tablespoons unsalted butter
2 tablespoons flour
1 1/2 cups milk
Salt and pepper

Add the butter over medium-low heat. When the butter is half melted, add the flour and stir to combine. When the butter is completely melted, add the milk and cook for 5-10 minutes until the mixture has reached the desired thickness. Season with salt and pepper.

Bolognese
(Adapted from Anne Burrell)

1 onion, cut into 1-inch dice
2 small carrots, cut into 1/2-inch dice
1 1/2 ribs celery, cut into 1-inch dice
4 cloves garlic
Extra-virgin olive oil for the pan
Kosher salt
1 1/2 pounds ground chuck, brisket or round or combination (I used chuck)
1 cup tomato paste
1 1/2 cups hearty red wine
Water
1-2 bay leaves
1/2 bunch thyme, tied in a bundle

In a food processor, puree onion, carrots, celery, and garlic into a coarse paste. In a large pan over medium heat, coat pan with oil. Add the pureed vegetables and season generously with salt. Bring the pan to a medium-high heat and cook until all the water has evaporated and they become nice and brown, stirring frequently, about 15 to 20 minutes. Be patient, this is where the big flavors develop.

Add the ground beef and season again generously with salt. Brown the beef, cooking another 15 to 20 minutes.

Add the tomato paste and cook until brown about 4 to 5 minutes. Add the red wine. Cook until the wine has reduced by half, another 4 to 5 minutes.

Add water to the pan until the water is about 1 inch above the meat. Toss in the bay leaves and the bundle of thyme and stir to combine everything. Bring to a boil and reduce to a simmer, stirring occasionally. As the water evaporates you will gradually need to add more, about 2 to 3 cups at a time. Don't be shy about adding water during the cooking process, you can always cook it out. Stir and taste frequently. Season with salt, if needed. Simmer for 3 1/2 to 4 hours.

Notes on making the pasta:
With just one egg, the pasta dough didn't come together very well so I ended up adding some water. Many of the other Daring Bakers added extra eggs.

Notes on making the sauce:
My onion, carrot, celery mixture turned green and tasted green the first time I cooked it out so I threw it out and started again. It turned green the second time, but I pressed on. I cooked it for about 30 minutes until fond started develop on the bottom of my pan and it ended up tasting fine with the meat.

As the meat browned, I drained as much of the oil off as I could. I didn't want to end up with an oily end product.

Taste the sauce each time you add water, but be careful of how much salt you add each time. As the sauce cooks down, the flavor gets more concentrated and you don't want a salty meat sauce

Stumble Upon Toolbar

Thursday, March 26, 2009

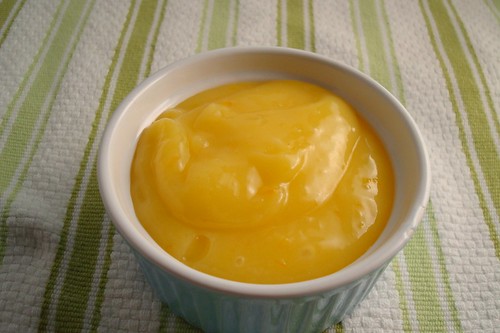
Meyer Lemon Curd

Meyer Lemon Curd

Last week my friend Raul gave me about twenty pounds of lemons. Ok, I may be exaggerating just a bit, but I think he gave me at least ten pounds. The first thing I thought of when he asked me what I would do with all the lemons was to make a curd. Of course there was the small problem of me never having had curd that I could remember and also the fact that I still had a few Meyer lemons that needed to be used. A quick search for lemon curd recipes led to a bunch of Meyer lemon curd recipes and this particular recipe was the best for it's ease and lack of fuss. Besides my Daring Bakers recipes, I like the things I make to be as un-fussy as possible. I also liked the fact that I did not need to halve the recipe so that I would not be left with vats of extra curd in case I didn't like it. Well guess what? I didn't just like it, I loooovvvveeeed it! I could not get enough of the velvety, tart smooth lemon flavor. I am almost embarrassed to admit this, but I just kept sticking my finger the the finished curd and licking it clean. Much like how one does with peanut butter. It was that good. I had heard of people slathering lemon curd on toast and didn't think much of it until I tried it myself. I can tell you, I have been having lemon curd on toast every day this week. I also put the curd to another spectacular use that I will share with you in a few days. If you haven't tried lemon curd, I strongly suggest you go get a couple of lemons and see what the fuss is about. You won't be sorry. You can definitely make this recipe with regular lemons if Meyer lemons aren't readily available where you are. The only change you may want to do is to up the amount of sugar.


Meyer Lemon Curd
(From No Recipes)

1 stick unsalted butter
2 Meyer lemons, zested
1/2 cup Meyer lemon juice
3/4 cup sugar
2 eggs, separated

Drop the butter into a heavy bottomed saucepan over low heat and let it melt (the pan should be just warm enough to melt the butter). Once it’s mostly melted turn off the heat.

In a medium bowl, add the sugar and the lemons into it. Then squeeze the juice and add it to the sugar.

Separate the eggs, dropping the yolks into the pot of melted (but not hot) butter and the whites into the sugar mixture.

Whisk the yolks and butter together until well combined. Then take the whisk to the sugar mixture until well combined. Pour the sugar mixture into the pot with the butter and whisk it all together.

Turn the heat back on to low and use a heat-proof silicon spatula to constantly stir the mixture, scrapping the bottom and sides of the pan to make sure nothing burns. If you have an instant read thermometer, the temperature should read 170 degrees. Otherwise, just keep stirring until the curd thickens enough to coat the spatula. Make sure you don’t over cook it.

As soon as it’s done, take it off the heat and pour it into another container.

Stumble Upon Toolbar

Wednesday, March 25, 2009

Pork with Chives

Pork with Chives

Here's the recipe that I served the peanut slaw with. Looks good, huh? It could not have been easier. I saw this recipe literally minutes after I saw the slaw recipe and thought they would be so good together. Turns out, I was right. Once all of the ingredients are ready, this comes together very quickly so it is a perfect weeknight meal or quick Sunday lunch in my case. It's also really tasty and probably healthier than something you get at a takeout place. The chives are very mild so if you are looking for a more pronounced onion flavor, I would suggest using green onions instead. The sauce is nice and flavorful and the rice helped soak up the saucy goodness. I froze the pork for about twenty minutes before I sliced it. This helped me get the nice thin slices you see above. I highly recommend this dish and you can certainly play with the flavors a bit. I think it would be great with some grated fresh ginger or toasted sesame oil.

Pork with Chives
(Adapted from Beyond the Great Wall: Recipes and Travels in the Other China as found on Serious Eats)

Makes 2 servings

1/2 pound boneless lean pork, such as loin or trimmed chops, thinly sliced into 1 1/2-by-1/2-inch pieces
1 tablespoon cornstarch
1 tablespoons peanut oil (or vegetable oil)
Large pinch red pepper flakes
1 garlic clove, minced
1/2 teaspoon salt, or to taste
A large handful of chives, cut into 2-inch lengths
1/2 cup low-sodium chicken broth
1 tablespoon low-sodium soy sauce
1-2 tablespoons fresh cilantro, chopped

In a small bowl, combine the pork and cornstarch and mix to coat the meat well. Set aside for 30 minutes to 2 hours (refrigerate, covered, if letting stand for longer than 30 minutes).

When ready to proceed, place a wok over high heat. When it is hot, add the oil and swirl a little. Add the garlic and red pepper flakes and cook until fragrant, about 10-20 seconds. Be careful not to let the garlic burn. Toss in the pork and stir-fry vigorously until all the pork has changed color, about 3 minutes. Add the salt and chives and stir-fry for another minute. Add the broth and bring to a boil. Add the soy sauce and stir briefly, until the sauce thickens. Taste for seasonings, and adjust if necessary.

Stumble Upon Toolbar

Tuesday, March 24, 2009

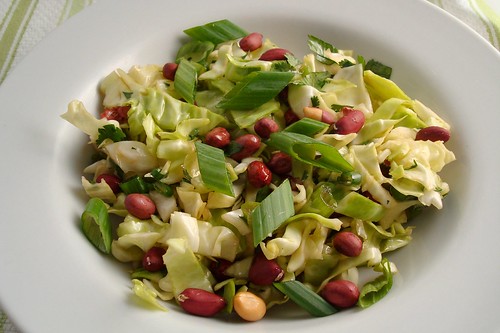
Crunchy Peanut Slaw

Crunchy Peanut Slaw

As usual, I was planning my weekly meals and this recipe popped up on The Kitchn, followed by another one on Serious Eats and I knew I had to add them both to my weekly plan immediately. I have never been a huge coleslaw eater, but I have really come to love cabbage in the last few months. This recipe does not disappoint. It's a snap to prepare and really tasty. I used garlic roasted peanuts I get at the farmers market for snacks. I think shelling the peanuts was probably the biggest work in making this salad. It was so good and crunchy with that always awesome combination of salty and sweet. I think next time I will sub honey or agave nectar for the sugar, but it was still good. I don't think I shredded the cabbage as thinly as I could have, but I honestly don't think it took away from the pleasure of eating the salad. I served it as a side dish to a wonderful stir fry that I will be sharing with you tomorrow so stay tuned.


Crunchy Peanut Slaw
(Adapted from The Kitchn)

Makes 4 servings

For the salad:
1/2 medium head green cabbage, outer leaves removed
3/4 cup roasted, unsalted peanuts
3 green onions
2 tablespoons chopped cilantro

Dressing:
1 tablespoon canola oil
1 1/2 tablespoons rice vinegar
1 1/2 teaspoons sugar (or more, to taste)
1 1/2 teaspoons sesame oil
1/2 teaspoon soy sauce (or more, to taste)

Shred the cabbage very finely. Toss with the peanuts in a large bowl. Chop the scallions, including the green and white parts. Toss the scallions and chopped cilantro with the cabbage.

Whisk the dressing until emulsified, then taste and adjust to your own preferences of sweetness and saltiness.

Toss with the cabbage. Garnish with a few more peanuts and green onions and serve.

Stumble Upon Toolbar

Monday, March 23, 2009

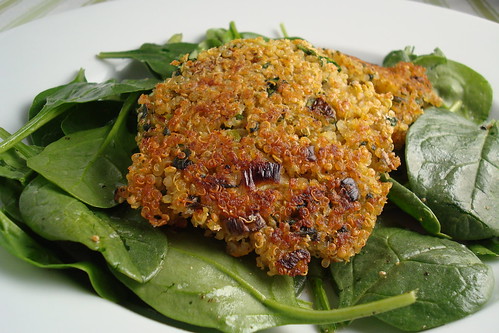
Quinoa Cakes

Quinoa Cakes

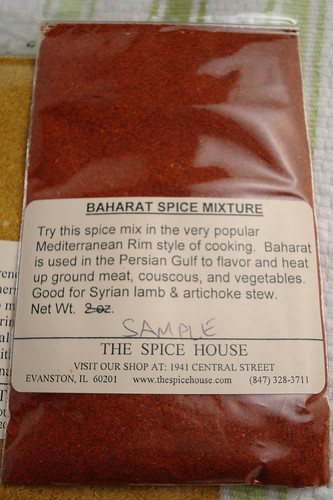
I recently saw these quinoa cakes on The Barefoot Kitchen and immediately added them to my weekly meal plan. I have been on quite the spinach kick lately (probably because the guy who sells it to me is just so dang adorable, seriously!) and I love quinoa so of course I wanted to adapt these cakes to my tastes. After I posted the star anise and vanilla bean ice cream, the lovely people at The Spice House contacted me. Since I let them use my picture on their website, they wonderfully sent me some spices to use in my cooking. I thought it would be a good idea to add one of these spices to my quinoa cakes. The only thing I measured while making this recipe was the quinoa so if you decide to make this, please take these measurements with a grain of salt. I added and subtracted things as I saw fit and you should definitely feel free to do the same. I had planned to serve this with some kind of yogurt dipping sauce, but it was late, I was tired and the best I could come up with was a spinach salad. Sue me. There really isn't a recipe for the salad. Some spinach, a spritz or two of lemon juice, a small glug of olive oil and season with salt and pepper. It's a go-to salad and vinaigrette for me that I can always rely on in a pinch. Once again, feel free to adapt part or all of this recipe to your tastes. When I make vegetable cakes like this, I always like some kind of onion flavor which here was provided by the green onion. The Baharat mixture added a nice background heat which was great because it wasn't too hot, but enough to feel it on your tongue. If you don't have this mixture at home, feel free to sub in some cayenne. I think I will definitely be experimenting with these quinoa cakes in the very near future to see what other mixtures I can come up with.

Baharat Spice Mixture

Quinoa Cakes
(Adapted from Barefoot Kitchen)

1 cup spinach, washed patted dry and roughly chopped
3 cloves garlic, minced
1 cup cooked quinoa
1 carrot, finely shredded
1 green onion, thinly sliced
1/2 teaspoon Baharat spice mixture
Salt and pepper
1 tablespoon Panko breadcrumbs
1 egg, beaten
Olive oil for frying

In a large bowl mix together the spinach, garlic, quinoa, carrot, green onion, Baharat, and Panko. Taste a liberally season with salt and pepper. Add the panko and egg and mix well to combine.

Heat a layer of olive oil in a non-stick skillet. Form the quinoa into 2" patties about 1/2 inch thick. Drop into the oil and cook until well browned on one side, 2-3 minutes. Flip and cook on the other side, then set on paper towels to drain.

Stumble Upon Toolbar

Sunday, March 22, 2009

Tender Greens

For the second day of spring, yesterday seemed quite the opposite. It was overcast and cool all day. Perfect day to stay in and laze around in sweats, except for the fact that I wanted to go check out the new West Hollywood outpost of Tender Greens. After a brisk walk, I found myself at the restaurant which is located inside the Hancock Lofts (which are still being completed). I have been hearing about Tender Greens for a while since they have locations in Culver City and San Diego, but I am one of those Angelenos who does not travel outside her comfort zone (read, Beverly Hills-Los Feliz) very often. You won't find me west of Century City very often and it takes a very special occasion to get me to go north of Mullholland. This is why I have never visited the Culver City location of Tender Greens even though it is only a few miles away. Luckily there is now one open a stone's throw from me.

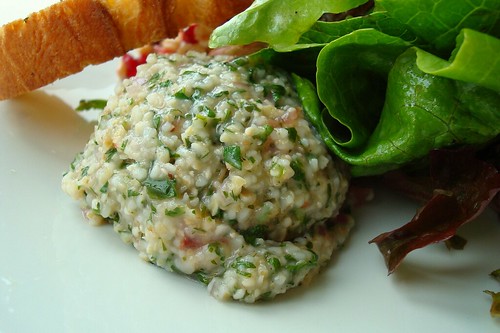
Tender Greens Tabbouleh

Tender Greens focuses on the food I love to eat and care deeply about. The focus is local, organic, and sustainable with even the beer and wine selection focusing on local brands. This particular branch was even built in an eco friendly way.

For my first lunch at Tender Greens, I decided to go with The Happy Vegan under their big salads menu. One of the things I noticed immediately is that there is something for every taste. Vegetarians, omnivores, vegans, and raw foodists will all be equally satisfied. My large plate of salad came with tabbouleh, green hummus, a farro salad, and a red quinoa salad and the whole plate was topped with "tender greens" and a large crouton.

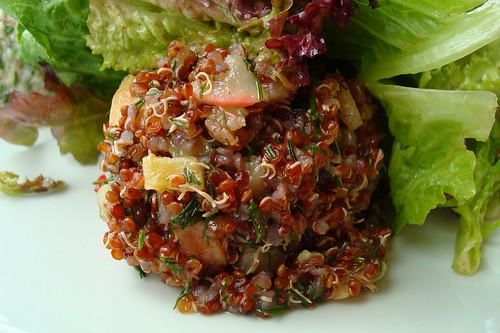
Tender Greens Red Quinoa

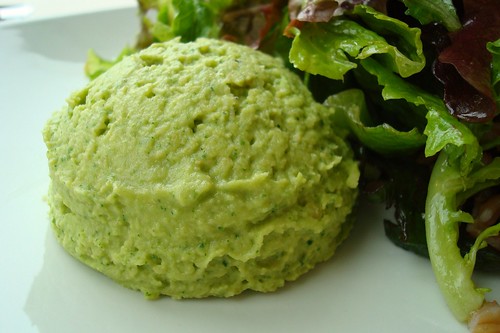
The red quinoa salad was comprised of yellow tomatoes, chopped cucumbers, thinly sliced radishes and a tangy dill dressing. This was the first salad I devoured on my plate. The farro had toasted hazelnuts and dried cranberries and a sweet dressing. This was my favorite salad on the plate. The tabbouleh had tons of fresh parsley, shallots, and tomatoes and a nice, tart dressing that managed to be creamy despite being a vegan dish. I think it was parsley that made the green hummus green, but I do know that I could not get enough of it. My only complaint (is it a complaint?) was that I wish I had an extra crouton with which to eat the hummus. No matter, I just ate it on it's own once the bread was gobbled up.

Tender Greens Farro Salad

There were a bunch of tempting looking desserts, but I managed to restrain myself knowing I had samoas ice cream waiting for me at home. Even though the restaurant has only been open a few days, I think it's repuation certainly preceded itself. I am glad I got there when I did because I noticed after I sat down to eat, a long line had developed at the entrance. I definitely think the buzz of the other locations helped with the popularity. Seeing as this particular location is right in the heart of "boys town" there is ample people watching which meant I hardly needed my new BlackBerry to keep me occupied.

Tender Greens Green Hummus

At a little over eleven bucks for a salad and a glass of tap water, this can definitely be a pricier option for lunch, but if you think about what you're getting, I think it can be worth it. It is certainly far better than the sludge you get at normal "fast food" restaurants and it sure doesn't make you feel as guilty. For the cost and the fact that I can't roll out of bed onto the doorstep, this may not replace my other option for fast, healthy and fresh, but Tender Greens will certainly go into my regular rotation for a nice, healthy weekend lunch.

Tender Greens West Hollywood
8759 Santa Monica Blvd, West Hollywood
(310) 385-1919

Stumble Upon Toolbar

Friday, March 20, 2009

Samoas Ice Cream

Samoas Ice Cream

Yesterday I promised you guys a sweet treat. Well, here it is...sweet enough for ya? I think I mentioned earlier in the week how I got attacked by the Girl Scouts at the grocery store last weekend (or maybe I Twittered about it). Having once been a Girl Scout myself, I feel it is necessary to support the cause. Plus, who can resist their cute little faces? I only allow myself to buy one box of Samoas and/or Thin Mints and this year I went with one box of Samoas, but I can't promise that if these girls are at the store tomorrow that I won't be tempted again. Normally I like to pop the box in the freezer and have one or two when the mood strikes. This time I thought I could get more creative. I have seen the national name brand Samoas ice cream in the stores and thought I would do my own twist on it. I decided to go with a vanilla bean ice cream base, a fudge swirl and lots of roughly chopped cookies. I don't know about you, but when I have chunks in my ice cream, I want BIG chunks! This ice cream is To. Die. For. Soooo rich and delicious and sinful. Of course I am going to have to walk extra laps this weekend to burn it off, but it's worth it. Have a great weekend!

Many thanks to Christine and Dawn for helping me figure out the three column format. How do you like it?

Samoas Ice Cream

Samoas Ice Cream

Makes 1 quart

Vanilla Bean ice cream (recipe follows)
Fudge swirl (recipe follows)
Most of a box of samoas, roughly chopped

Freeze the ice cream according to manufacturers instructions. In the last two minutes of freezing, slowly stream in the fudge. Transfer the ice cream to a quart sized container and mix in the chopped up cookies.

Vanilla Bean Ice Cream
(From David Lebovitz)

1 cup milk
Pinch of salt
3/4 cups sugar
1 vanilla bean
5 egg yolks
2 cups heavy cream
A few drops of vanilla extract

Heat the milk, salt, vanilla extract and sugar in a saucepan. Split the vanilla bean lengthwise and scrape the seeds into the milk with the tip of a paring knife. Add the bean pod to the milk.

Stir together the egg yolks in a bowl and gradually add some of the warmed milk, stirring constantly as you pour. Pour the warmed yolks back into the saucepan.

Cook over low heat, stirring constantly and scraping the bottom with a heat-resistant spatula until the custard thickens enough to coat the spatula. Strain the custard into the heavy cream. Rinse the vanilla bean and put it back into the custard and cream to continue steeping. Chill thoroughly, then remove the vanilla bean and freeze in your ice cream maker according to the manufacturers instructions.

Fudge Swirl
(Adapted from Perfect Scoop: Ice Creams, Sorbets, Granitas, and Sweet Accompaniments)

1/4 cup sugar
3 tablespoons light corn syrup
1/4 cup water
3 tablespoons unsweetened cocoa powder
1/4 teaspoon vanilla extract

This swirl can be prepared a day or two ahead of time, but if you make it at the same time as the ice cream, remember that it needs to cool before adding it into the ice cream.

In a medium sauce pan, whisk together the sugar, corn syrup, water, and cocoa powder. Heat over medium heat, whisking constantly, bringing the mixture to a low boil. Boil gently for one minute, then remove from the heat. Stir in the vanilla. Cool in a refrigerator before serving.

Stumble Upon Toolbar