Saturday, May 30, 2009

Feta Salsa

Feta Salsa

The other day I was reading food blogs when I saw this post on Kevin's blog. I immediately jumped up and made it myself. I had all the ingredients already and I needed something to with some chips I had just gotten. It takes about two minutes to make and the flavor is amazing!! Instead of using plain olive oil, I used a little bit of the oil from the sun dried tomatoes which added some great flavor. I will definitely be making this again and have it with some pita chips or a warm homemade pita (project!). Hope you are enjoying your weekend. Despite the gloom I am going to walk around and enjoy some art with the boys today. Have a good one!


Feta Salsa
(Adapted from Smitten Kitchen and Closet Cooking)

Makes 2 servings

4 ounces goat's milk feta cheese, crumbled
1/4 cup sun dried tomatoes in oil, chopped
1/4 cup pitted Kalamata olives, chopped
2 cloves garlic, grated or minced
1/2 teaspoon dried oregano
Juice from 1/2 small lemon
2 teaspoons olive oil (I used the oil from the sun dried tomatoes)
1 tablespoon flat leaf parsley, chopped

Mix all of the ingredients in a bowl and allow to sit for about 15 minutes for the flavors to come together. Serve with anything from vegetables, to pitas, to chips.

Printable Recipe

Stumble Upon Toolbar

Friday, May 29, 2009

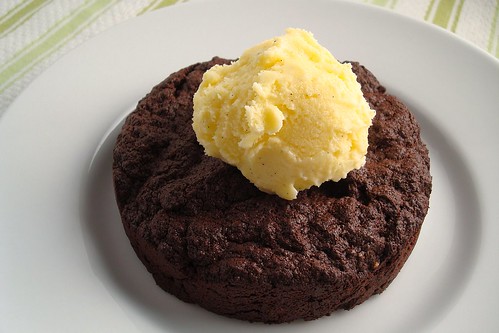
Buttermilk Ice Cream

Buttermilk Ice Cream

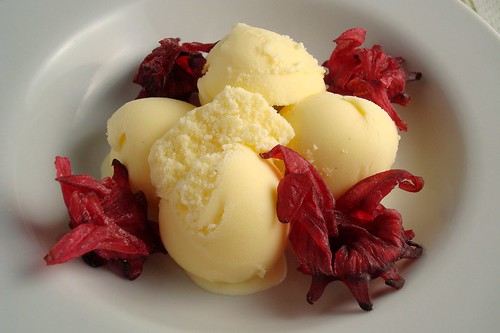
If Memorial Day is the unofficial beginning of summer, does that mean it is also the unofficial beginning of ice cream season? Is there even an ice cream season? I guess in SoCal, ice cream season is year round. We have 80 degree temps in January and 60 degrees in May/June (which is freeeezing for us!). It makes no sense. We're getting back in to that May Gray/June Gloom season here, but last weekend I felt like making some ice cream. I had buttermilk and egg yolks left from my party cake and I have had this recipe saved for a while. Remember when I made that amazingly rich and delicious buttermilk pie? This is basically that pie in ice cream form. It is so totally luxurious and very simple to make. I paired this with some dried hibiscus flowers that I just found at TJs. The sweet and tart flowers went perfectly well with the sweet ice cream with the tart bite of buttermilk. There is no cream cheese in this recipe, but I could swear with my eyes closed, it tasted like a cheesecake ice cream. FYI, if you haven't tried these dried flowers before, they are so delicious. I wish they had more nutritional value because I have been adding them to everything from cocktails to granola. More on the latter, soon. (I hope)

Buttermilk Ice Cream

Buttermilk Ice Cream
(Adapted from The Last Course via Smitten Kitchen)

Makes about 1 quart

2 cups heavy cream
1 1/4 cups sugar
6 to 12 large egg yolks *
2 cups buttermilk
Pinch of salt
1/2 a vanilla bean, or 1 teaspoon good-quality vanilla extract

Bring the cream and 1 cup of the sugar to a simmer in a heavy saucepan over medium heat (if you’re using the vanilla bean, scrape the seeds into the cream while it heats as well.)

In a separate bowl, whisk together the egg yolks and the remaining 1/4 cup of sugar.

After the cream comes to a simmer, turn off the heat and dribble a small amount into the egg yolks, whisking them constantly, to temper. Continue slowly adding the hot cream mixture to the egg mixture, whisking all the while. Once everything is incorporated, return the mixture to the saucepan where you heated the cream.

Cook over medium-low heat, stirring continuously, until it thickens enough to coat the back of a spoon. Strain into a bowl and mix in the buttermilk (and the vanilla extract if you are using that instead of the vanilla bean.) Cool the mixture completely, then freeze in your ice cream maker according to the manufacturer’s directions.

*I used 6

Printable Recipe

Stumble Upon Toolbar

Thursday, May 28, 2009

Wheatberry Salad with Cherries and Roasted Asparagus

Wheatberry Salad with Cherries and Roasted Asparagus

When you see my next few posts coming up, you will understand why I have been needing something fresh in my diet lately. This free time has left me with plenty of time to bake, but when it comes down to putting a real meal on the table, I have been suffering. Lucky for me, I had some asparagus left from the poached egg and asparagus and some cherries left from my Daring Bakers challenge. I thought they would be really great together in a sweet and savory salad. Recently Raul gave me another 10 pounds of lemons (or maybe less) so I used one to make a quick dressing and then laid the whole mess on a pile of arugula. To be honest, I actually made most of the salad the day before, but then had to jet out quickly to join one of the Prop 8 rallies so the rest of this came together quickly and easily. All I had to do to finish the salad was top it with a bit of my favorite goat's milk feta from the farmers market. It is a simple and delicious way to enjoy the tastes of summer and it all ties together from the sweet cherries to the nuttiness of the roasted asparagus and the sharp bite of the arugula and chew from the wheatberrries. This salad would definitely be great with some toasted pine nuts or walnuts to bring it all together and if you are a meat eater, a side of chicken breast could probably seal the deal too.


Wheatberry Salad with Cherries and Roasted Asparagus

Wheatberry Salad with Cherries and Roasted Asparagus
(By Esi)

Makes 2 servings

1/2 cup hard wheatberries (you can use soft wheatberries and reduce the cooking time)
10 stalks thin asparagus, trimmed
Extra-virgin olive oil
Kosher salt and black pepper
1/2 cup cherries, pitted and halved
1 tablespoon fresh lemon juice
1-2 handfuls baby arugula
Crumbled feta

Bring 2 cups salted water to a boil. Add the wheatberries and cook for 40-50 minutes until they are tender (reduce the cooking time by half if using soft wheatberries). Drain and set aside to cool.

Meanwhile, preheat the oven to 400 degrees and line a baking sheet with foil. Toss the asparagus with a bit of oil and salt and pepper and roast for 10-15 minutes until tender. Once they have cooled, slice the asparagus into 1-2 inch spears.

Mix the lemon juice with one tablespoon of olive oil and season with salt and pepper to taste. In a large bowl mix together the wheatberries, cherries and asparagus spears. Toss wheatberry mixture with half of the dressing.

Toss a few handfuls of arugula with the remaining dressing. Lay the arugula on a plate and top with the wheatberry mixture. Finish with a few sprinkles of crumbled feta. Serve cool or at room temperature.

Printable Recipe

Stumble Upon Toolbar

Wednesday, May 27, 2009

Daring Bakers: Strudel

Ricotta and Cherry Strudel

Can we say down to the wire? Normally when I learn what the DB challenge is, I have it completed within a week or two. This one was done just a few hours ago! Oh yes, the required lines:

The May Daring Bakers’ challenge was hosted by Linda of make life sweeter! and Courtney of Coco Cooks. They chose Apple Strudel from the recipe book Kaffeehaus: Exquisite Desserts from the Classic Cafés of Vienna, Budapest, and Prague by Rick Rodgers.

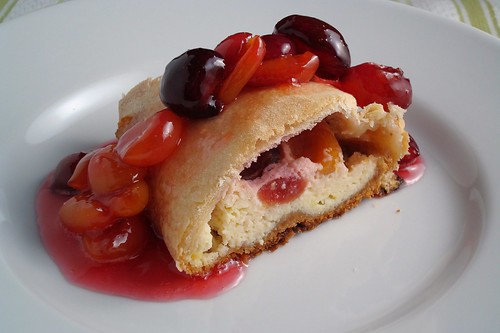
I have managed to keep myself surprisingly busy lately, which is part of the reason why I just completed my challenge today. I knew I wanted to make something a little more seasonal. Originally I had planned on doing a strawberry strudel, but lately cherries have been all over the farmers market. I saw a recipe for ricotta and cherry strudel and I knew that was what I would be making. It was especially lucky that I already had ricotta left from my Daring Cooks challenge a few weeks ago. I used the dough from the challenge and then played around with the filling.

Ricotta Strudel

The dough came together very easily in the stand mixer, but it can also be done by hand. While the dough was resting, I went to work on my filling. I ended up making two small strudels because I wanted to test the stretching of the dough without having to make a double batch. One strudel had cherries baked inside as well as a cherry sauce on top and the other was only filled with the remaining ricotta and topped with the cherry sauce. I think I preferred the plain ricotta strudel topped with the sauce which gave some flavor to the bland dough. Rolling and stretching turned out to be easier than I thought. I probably could have gotten the dough thinner, but with time not on my side, I went with what I had.

I would love to try this again and make a savory filling instead. People got very creative with their fillings, be sure to check the other Daring Bakers' sites to see how they did. The dough recipe and tips can be found here or here. Recipe for the filling is below.

Ricotta and Cherry Strudel
(Adapted from Lidia Bastianich for Bon Appetit, May 2007)

Ricotta filling:
8 ounces whole-milk fresh ricotta cheese
1/4 cup sugar
1 teaspoon finely grated lemon zest
1/4 teaspoon vanilla extract
1 egg

Cherry filling:
8 ounces cherries, halved and pitted, reserve any juices
1/4 cup sugar
1 teaspoon fresh lemon juice
1 teaspoon triple sec

Crumb filling:
6 tablespoons finely ground graham cracker crumbs
1 tablespoon sugar

4 tablespoons unsalted butter, melted

To make the ricotta filling:
Line a strainer with a double layer of cheesecloth and set over a deep bowl. Place the ricotta in the strainer and allow to drain overnight in the refrigerator. Squeeze the cheesecloth to drain as much liquid as possible from the mixture.

Using an electric mixture, beat the ricotta, sugar and lemon zest until light and fluffy. Beat in the egg until well incorporated. Refrigerate while preparing the cherries and stretching the dough.

To make the cherry filling:
In a medium bowl, mix together the cherries, any juices, the sugar, lemon juice and triple sec. Allow to sit for an hour or so for the flavors to come together.

Drain half of the cherry mixture and save the juices. Use the drained cherries in the strudel. Use the remaining cherries and juices to make a sauce. Place them in a small saucepan and bring to a boil. Cook until the mixture has thickened, about 4-8 minutes.

To make the crumb filling:
Mix the crumbs and the sugar.

To assemble the strudel, brush the stretched out dough with some of the melted butter. Lay a thin layer of the crumbs in the center of the dough. Top with some of the ricotta mixture and then gently press the drained cherries into the ricotta. Roll the dough and brush the top with more melted butter. Bake for 30 minutes or until golden brown. Let the strudel sit for 30 minutes before cutting into it. Serve warm or at room temperature.

Stumble Upon Toolbar

Tuesday, May 26, 2009

Valley Greek Festival

Calamari Rings from Greek Festival

I hope you all had a good long weekend. Mine was a great mix of relaxing AND partying. Friday night out dancing was super fun, but left me motionless the next day so it was nice to get out on Sunday afternoon to attend the Valley Greek Festival. We're coming up on the two year anniversary of our trip and our friends' amazing wedding. Last year we celebrated with a Greek potluck, but this year we decided to check out the festival. I have to admit, I think we were all a little apprehensive at first. None of us really get out to Northridge very often and we hadn't really cemented down the plans. Eventually we all agreed to meet at 5 and see what the festival was all about.

Gyro from Greek Fest

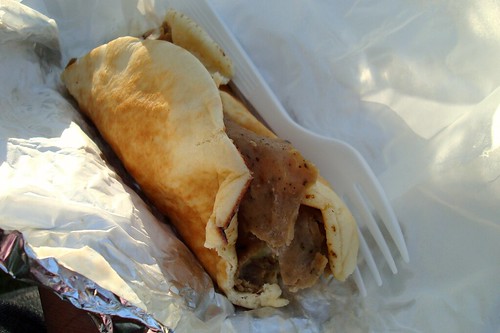
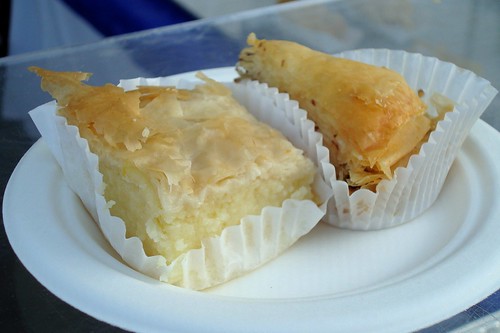
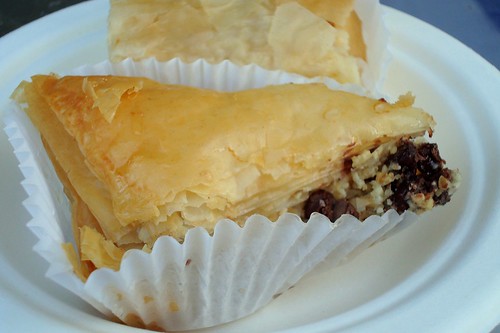
The first thing we noticed when walking in was many booths serving up popular Greek dishes. The lines however, were a bit of a turn off. After watching a bit of a cooking demonstration where we learned how to stuff and roll grape leaves, we decided that we couldn't wait any longer to eat. On our way to grab food, we noticed the line for booze was pretty short so we started off with some Greek wine. Most of us went with calamari rings and gyros. Both were excellent. To the side of the calamari station, they had bottles of Cavender's seasoning which we all ended up buying some of later on. The calamari was perfectly cooked and nice and crispy on the outside. The gyro meat was amazingly seasoned and the soft, warm pitas were fantastic. I felt like I was back on the streets of Mykonos after eating one. Later we made our way to one of the vendors selling Greek pastries. Chris and I shared the chocolate baklava and Galatoboureko which was described as sweet custard between layers of pastry and topped with a light syrup. It was good, but the chocolate baklava with it's flaky layers and crunchy nuts was definitely the stand out.

Greek Desserts

After all that food and wine, we decided to burn some calories on the dance floor. There were live musicians playing and people were really getting into it. It was such a fun afternoon and evening, I love celebrating with these people so much and I am excited to see how we end up spending the occasion next year!

Chocolate Baklava


As I mentioned, we all ended up buying some of the Cavender's seasoning. Yesterday, I used some in scrambled eggs and it kicked my eggs up so much, I may use it all the time.


Stumble Upon Toolbar

Sunday, May 24, 2009

BBQ Cheeseburger Pizza

Cheeseburger Pizza

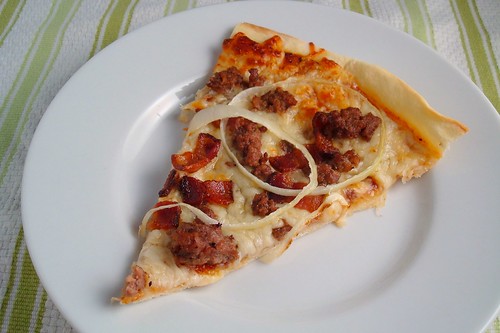
When I saw this pizza last week on Dawn's most excellent site, I knew I was going to be making it in the very near future. Doesn't it sound awesome, combining two foods into one delicious thing? I still have some rosemary pizza dough in my freezer, but I didn't think it would go with this combination so I quickly whipped up the dough I have used in a few pizzas before, but since I was lazy and didn't prep the night before, I used the dough the same day I made it. This is an insanely delicious pizza. It has heart attack written all over it, but since I have been working out a lot more (with all that free time on my hands), I really didn't feel as guilty about eating it. Plus, I made sure the beef and bacon were well drained before putting them on top of the pizza. Normally I favor a very thin crust on my pizza, but this time I tried to keep the crust a little thicker to be able to withstand the toppings. To get it to the size I wanted, it ended up being a little thinner than I expected, but I didn't mind. Since it's Memorial Day weekend and people are getting into the grilling mood, I think this pizza would be a great addition to any barbecue. I hope you are enjoying your weekend.

Cheeseburger Pizza Slice

BBQ Cheeseburger Pizza
(From Vanilla Sugar)

Pizza dough
Ground beef, cooked and crumbled
Bacon, sliced and cooked
Thinly sliced onions
BBQ Sauce
Red pepper flakes (omit if using a spicy BBQ sauce)
Shredded mozzarella cheese
Extra-virgin olive oil for brushing

Preheat the oven to 450 degrees and line a baking sheet with parchment paper.

Roll out the pizza dough to desired thinness and place on the baking sheet. Mix the barbecue sauce with red pepper flakes if using. Spread a thin layer of barbecue sauce over the dough. Spread a layer of cheese over the sauce and then top with the bacon and ground beef. Lay the onions over the meat, overlapping if desired. Brush the edges of the dough with olive oil and bake for 10-15 minutes until the cheese is melted and browned.

Printable Recipe

Cheeseburger Pizza

Stumble Upon Toolbar

Saturday, May 23, 2009

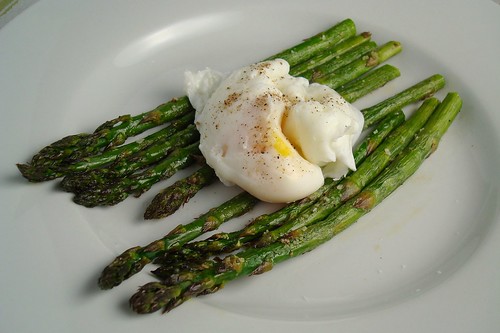
Roasted Asparagus with a Poached Egg

Roasted Asparagus with a Poached Egg

The other day I went out for a loooooong (7.4 miles) walk. When I got home I was so hungry, I just started eating everything in site. At some point I decided to be slightly virtuous so I made this dish. I absolutely love asparagus (evidence) and roasting it is one of my favorite ways to enjoy it. In fact, I spent the entire summer of 2001 living on roasted asparagus and whole wheat bread...I had weird habits in college. This is so simple and delicious. If you have some bread, go ahead and toast it up to have something to sop all the deliciousness up with. I have some asparagus left and since I spent another night out with the boys last night, I will probably be having this again verrry soon. Enjoy your Saturday!


Roasted Asparagus with a Poached Egg

Makes 1 serving

6-8 stalks asparagus, trimmed
Extra-virgin olive oil
Kosher salt and freshly ground black pepper
1 egg, cracked into a small bowl being careful not to break the yolk
White vinegar

Preheat the oven to 400 degrees.

Line a baking sheet with foil and lay the asparagus on top. Toss the asparagus with a bit of oil and season with salt and pepper. Roast 10-15 minutes until the asparagus is tender.

Meanwhile, bring a pot of water to a boil. Reduce to a simmer and add a splash of vinegar. Carefully pour the egg into the water. Use a spoon to cover the whites with water. Cook for 2-3 minutes until the whites have set. Remove the egg from the water with a slotted spoon and serve on top of the asparagus.

Printable Recipe

Stumble Upon Toolbar

Thursday, May 21, 2009

Peas with Bacon and Eggs

Peas with Bacon and Eggs

Thanks again for all your amazing comments yesterday. You all make me feel so special, I felt like I was winning a major award! :)

So anyway, I spent some QT with my friends over the weekend and as usual we went to the farmers market and I was excited to find some fresh peas already shelled. I eagerly scooped up a bag without the slightest idea as to what I would do with them. I wasn't really in the mood for pasta, but I had some bacon and since peas and bacon are a natural combination, I whipped this up. This would definitely be great mixed into a pasta and topped with a poached egg to give it some sauciness. One note about using fresh peas...you should really use them as soon as you get them because the longer you wait, the starchier and less sweet they get. This was really good, but the peas were not quite as sweet as I hoped and dreamed they would be and I made this only a day after I had picked up the peas. The long weekend is almost upon us. Do you have any Memorial Day plans?

Peas with Bacon and Eggs
(By Esi)

Makes 2 servings

4 slices bacon, chopped
1 shallot, chopped
2 cloves garlic, chopped
Salt and pepper
1 cup fresh or frozen shelled peas
2 eggs, hard boiled and sliced

In a large skillet, cook the bacon over medium-high heat until crisp. Remove the bacon with a slotted spoon and drain the bacon on a towel. Drain most of the fat from the pan except for about two teaspoons.

Add the shallots and garlic to the pan and season with salt and pepper. Cook until they are softened and the shallots are translucent, about 5 minutes. Add the peas to the pan and toss to combine. Cook for about 3 minutes. Add the bacon back to the pan and stir to combine. Transfer to a plate and top with the sliced eggs.

Printable Recipe

Stumble Upon Toolbar

Wednesday, May 20, 2009

Perfect Party Cake (and a Blogiversary)

Perfect Party Cake

Well whadya know? This little blog of mine is now one year old and I feel like celebrating! I even baked a cake! This little site which started as a hobby has turned into something amazing for me. I have met so many incredible people that I hope to meet in person someday and formed some amazing friendships. Unlike Julie Powell, I think food bloggers are some of the best people in the world.

I thought it would be a fun to take a trip down memory lane and highlight some of my favorite and popular posts from the past year. This is going to be long as there were over three hundred to pick from. Sit back and relax...

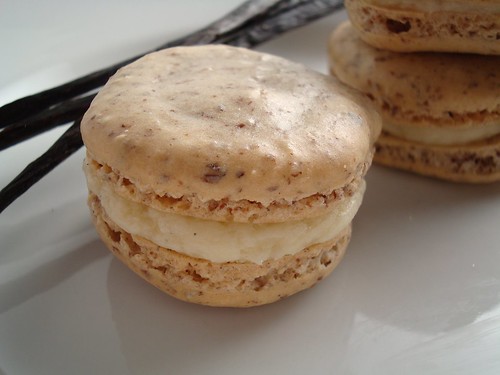
One of the best things about food blogging is getting to try new techniques and try things in the kitchen that I would not have done before. One of my favorite (and most delicious) experiments were successful French macarons. It took me a couple of tries, but look how delicious they turned out. I can't wait to make them again.
Macarons with Vanilla Bean Honey Buttercream

The Daring Bakers French yule log was quite a terrifying experience, but it in the end it was great to learn so many new techniques and made me really love and appreciate the stand mixer.

French Yule Log

I finally tried my hand at making my own ice cream both with and without a machine. Pomegranate ice cream without a machine:
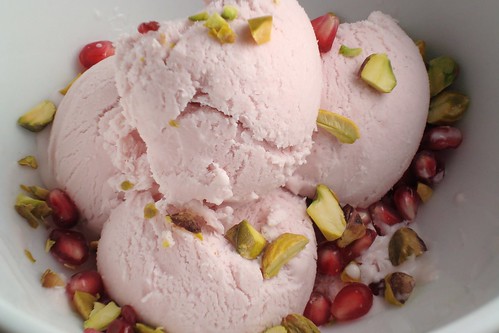
Pomegranate Ice Cream

Star anise and vanilla bean ice cream with a machine (and check it, The Spice House loved my pic so much, they use it on their website):
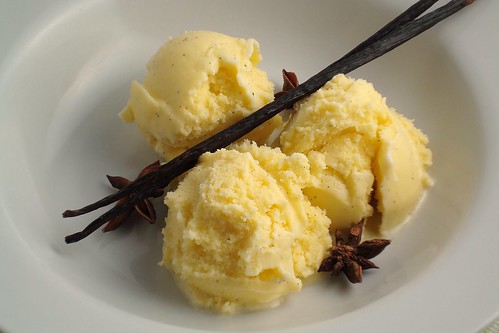
Star Anise and Vanilla Bean Ice Cream

Not everything I make is difficult. Actually, most things I make are quite simple. Here are some of my simple favorites.

Bacon and Tomato Hash was so delicious, I think I made it four times in one weekend.

Bacon and Tomato Hash

Figs with Ricotta and Pistachios were a delicious way to use one of my favorite summer fruits.

Figs with Ricotta and Pistachios

Pumpkin Chocolate Chip Cookies
brought back wonderful memories of cookies my friend's mom used to make when I was a kid.

Pumpkin Chocolate Chip Cookies

I try to keep things mostly healthy around here, but I really can't resist an extravagant treat. Ever had chicken and waffles? If not, try this. You'll love them. I promise.

Chicken and Waffles

Pumpkin Cinnamon Rolls
. Nuff said.

Pumpkin Cinnamon Rolls

One of my focuses on this site is local and sustainable food so I was very excited to attend one of the Taste Pavillions at Slow Food Nation last summer. I am looking forward to participating in more Slow Food events in the future.

Snail Bread at Slow Food Nation

After months of drooling over delicious dessert posts, I finally joined the Daring Bakers, and most recently the Daring Cooks. Some of the challenges have been amazing and actually pretty simple.
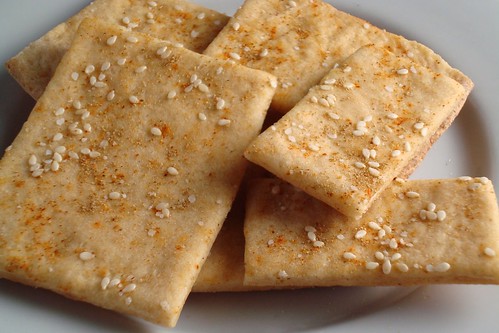
Vegan Lavash Crackers

And others, not so much
...

Chocolate Valentino with Star Anise Ice Cream

You guys have put up with me with some of my obsessions including figs, pomegranates, and Adele. I am lucky you indulge me and keep coming back.

As for this cake, I put out a request via Twitter for a good celebration cake. Many, many thanks to Hilda of Saffron & Blueberry for picking the winner! This was so fun to make and I am glad I had a chance to since it was a Daring Bakers pick before I joined. It also gave me a chance to try a swiss buttercream which was something I had never done before. I loved it although I do think it had a bit too much lemon juice. I love lemon and strawberries together. (Evidence) I used a strawberry perseves in the filling. Use good preserves in this cake, it makes a difference. Obviously my cake decorating and cutting skills need some work, but overall I thought it was pretty great. Alright, I think this is officially my longest post ever so I am going to stop talking now. Thanks for making it a great year and cheers for even better things to come!

Perfect Party Cake
(Adapted from Baking: From My Home to Yours)

Makes 1 4.5-inch cake

For the cake:
1 cup plus 2 tablespoons, cake flour
1 1/2 teaspoons baking powder
1/4 teaspoon salt
2/3 cup buttermilk, at room temperature
2 large egg whites at room temperature
3/4 cup sugar
1 teaspoon grated lemon zest
4 tablespoons unsalted butter, at room temperature
1/4 teaspoon pure vanilla extract

For the Buttercream:
1/2 cup sugar
2 large egg whites
12 tablespoons (1 1/2 sticks) unsalted butter, at room temperature
2 tablespoons fresh lemon juice*
1/2 teaspoon pure vanilla extract

For Finishing:
1/3 cup seedless strawberry preserves, stirred vigorously or warmed gently until spreadable

Getting ready: Center a rack in the oven to 350 degrees Farenheit. Butter two 4.5-inch round cake pans and line the bottom of each pan with a round of buttered parchment or wax paper. Put the pans on a baking sheet.

To make the cake: Sift together the flour, baking powder and salt. Whisk together the milk and egg whites in a medium bowl. Put the sugar and lemon zest in a mixer bowl or another large bowl and rub them together with your fingers until the sugar is moist and fragrant. Add the butter and, working with the paddle or whisk attachment, or with a hand mixer, beat at medium speed for a full 3 minutes, until the butter and sugar are very light. Beat in the extract, then add one third of the flour mixture, still beating on medium speed. Beat in half of the milk-egg mixture, then beat in half of the remaining dry ingredients until incorporated. Add the rest of the milk and eggs, beating until the batter is homogeneous, then add the last of the dry ingredients. Finally, give the batter a good 2-minute beating to ensure that it is thoroughly mixed and well aerated. Divide the batter between the two pans and smooth the tops with a rubber spatula. Bake for 30 to 35 minutes, or until the cakes are well risen and springy to the tough – a thin knife inserted into the centers should come out clean. Transfer the cakes to cooling racks and cool for about 5 minutes, then run a knife around the sides of the cakes, unmold them
and peel off the paper liners. Invert and cool to room temperature right side up. (The cooled cake layers can be wrapped airtight and stored at room temperature overnight or frozen for up to 2 months.)

To Make the Buttercream: Put the sugar and egg whites in a mixer bowl or other large heatproof bowl, fit the bowl over a pan of simmering water and whisk constantly, keeping the mixture over the heat, until it feels hot to the touch, about 3 minutes. The sugar should be dissolved, and the mixture will look like shiny marshmallow cream. Remove the bowl from the heat.

Working with the whisk attachment or with a hand mixer, beat the meringue on medium speed until it is cool, about 5 minutes. Switch to the paddle attachment if you have one, and add the butter a stick at a time, beating until smooth. Once all the butter is in, beat the buttercream on medium-high speed until it is thick and very smooth, 6 to 10 minutes. During this time, the buttercream may curdle or separate – just keep beating and it will come together again. On medium speed, gradually beat in the lemon juice, waiting until each addition is absorbed before adding more, and then the vanilla. You should have a shiny, smooth, velvety, pristine white buttercream. Press a piece of plastic against the surface of the buttercream and set aside briefly.

To Assemble the Cake: Using a sharp, serrated knife and a gentle sawing motion, slice each layer horizontally in half. Put one layer cut side up on a cardboard cake round or a cake plate protected by strips of wax or parchment paper. Spread it with one third of the preserves. Cover the jam evenly with about one quarter of the buttercream. Top with another layer, spread with preserves and buttercream and then do the same with the third layer (you’ll have used all the jam and have buttercream left over). Place the last layer cut side down on top of the cake and use the remaining buttercream to frost the sides and top.

Serving: The cake is ready to serve as soon as it is assembled, but it’s best to let it set for a couple of hours in a cool room. Serve it at room temperature with anything from milk to sweet or bubbly wine.

*I found this a little too lemony, you may want to reduce the amount to 1 tablespoon for a small cake or use 2 tablespoons if doubling the recipe.
Printable Recipe
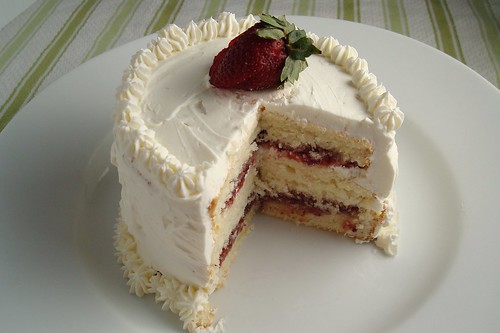
Perfect Party Cake

Perfect Party Cake Slice

Stumble Upon Toolbar

Monday, May 18, 2009

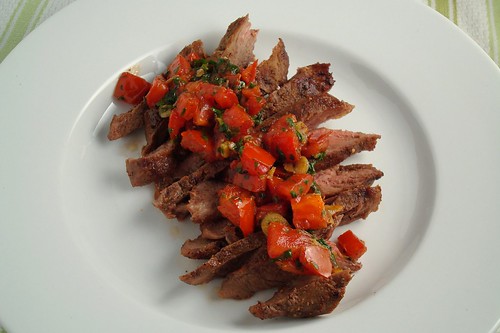
Steak with Tomato and Cilantro Sauce

Steak with Tomato and Cilantro Sauce

If you have been reading this blog for a while, you have probably realized that I don't eat a whole lot of red meat. However, once in a while I do get a craving for a nice steak...or maybe it is just the cuteness of the guy who sells grassfed beef at my farmers market. Anyway, I had a steak in my freezer for about a month and one of my random red meat cravings kicked in so I wanted to find a good recipe to make. I am really loving the flat iron cut which is pretty inexpensive, but very tender and needs little to dress it up. As you can probably tell from this picture, I over-cooked my steak just a bit, but it was still really delicious. Plus, this recipe for the sauce made a ton which was good since I could not get enough. If you aren't a red meat eater, I really think this sauce is versatile enough to work with chicken or fish. This recipe was a great thing to have in my stomach when I went out dancing with my boys to forget about my recent troubles...I'm still recovering, but it was super fun!


Steak with Tomato and Cilantro Sauce
(Adapted from Bon Appetit, June 2001)

1/4 teaspoon ground cumin
1/4 teaspoon chili powder
8 ounces flat iron steak, about 1 inch thick
1-2 tablespoons olive oil
3 large garlic cloves, thinly sliced
3 Roma tomatoes, seeded, diced
1/2 cup chopped fresh cilantro leaves

Rub cumin and chili powder onto both sides of steak, then sprinkle with salt and pepper. Heat 1 tablespoon oil in heavy large skillet over medium-high heat. Add steak to skillet and sauté until cooked to desired doneness, about 4 minutes per side for medium-rare. Transfer steak to plate. Add 2 teaspoons oil to skillet. Add garlic and stir 1 minute. Add tomatoes and cilantro. Cook until tomatoes begin to soften, about 4 minutes. Season sauce with salt and pepper.

Cut steak crosswise into thin slices. Arrange slices on platter. Mix any steak juices into sauce. Spoon sauce over steak.

Printable Recipe

Stumble Upon Toolbar

Friday, May 15, 2009

Tortelloni and Spring Vegetable Salad

Tortelloni Salad with Spring Vegetables

For the last week or so, I have been existing on leftovers and freezer/pantry finds. Luckily, I have been still able to eat pretty well, but my body has been begging me for some freshness. I was so excited to find this salad which is just full of vegetables and bright flavors. It's quick and simple to make and I made the full recipe which meant I had this for dinner and lunch over the last couple of days. It was so good, I didn't mind eating the same thing over and over again. This is not your typical pasta salad and that is a very good thing. Obviously the written recipe calls for these pesto tortelloni which are found at TJs, but any stuffed pasta will do. This is a great recipe to have on hand for lunches and if you are going to a picnic it is perfect since it travels well. It is really worth it to make the full batch and again since it travels well, it can be used for a picnic, a beach trip, or whatever fabulosity you have planned for the weekend.


Tortelloni and Spring Vegetable Salad
(Adapted from The Kitchn who adapted from 101 Cookbooks)

Makes 4 main dish servings

1 package Trader Joe's fresh pesto tortelloni (8 ounces) (or any fresh stuffed pasta)
1 pound asparagus, trimmed and cut into 2-inch spears
1 cup shelled peas (fresh or frozen)
3 cups fresh spinach
1 scallion, chopped
1/4 cup pine nuts
5 ounces feta, crumbled
1 tablespoon red wine vinegar (or a squeeze of lemon juice)
3 tablespoons extra-virgin olive oil
Salt and pepper

Bring a pot of water to a boil, salt. Meanwhile, prepare and ice bath and prep vegetables.

When the water is boiling, add the tortellini. It will cook in about 5 minutes (or follow package directions). After 3 minutes, add the asparagus. Add the peas for the last 30 seconds.

Strain the pasta and vegetables and place immediately into the ice bath. Once they've cooled, strain again and pour into a mixing bowl. Add the spinach, green onions, pine nuts and feta. Toss with vinegar and oil. Add salt and pepper to taste.

Printable Recipe
Stumble Upon Toolbar

Thursday, May 14, 2009

Daring Cooks: Ricotta Gnocchi

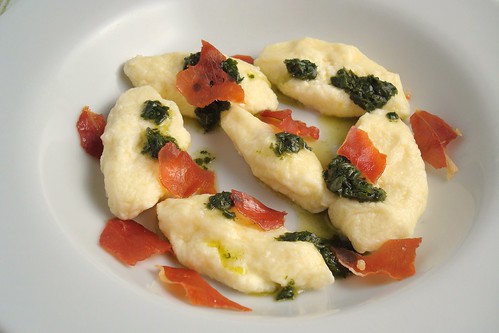
Ricotta Gnocchi

Our inaugural Daring Cooks challenge is picked by the founders of all things daring in the kitchen, Lis of La Mia Cucina and Ivonne of Cream Puffs in Venice. (I swear, they didn't make me say that!). I was so excited to learn that in addition to Daring Bakers, our fabulous founders had also decided to do the Daring Cooks. Most of my cooking recipes are pretty simple so it is going to be fun to push myself a bit when it comes to the savory side. I have made gnocchi one other time and it was a pretty fun process so I was excited to give this a go. Many of the Daring Cooks made their own ricotta, but I made this on one of those weekends filled with so many other recipes that I didn't feel like adding another one so I just used full fat ricotta from the store. I placed the ricotta in cheesecloth and let it "drain" overnight. I guess store bought ricotta is not as wet as homemade. I got absolutely no liquid out of it, even with wringing the cheesecloth. No matter, I pressed on. I found this challenge pretty easy, but in the end...I just didn't like the gnocchi. I enjoyed the flavor, but the texture was just not for me. I felt like I was eating baby food. For the "sauce" I made a basil oil and some crispy pancetta both of which I ate more of than the gnocchi.

Not everyone in the Daring Kitchen is a member of the Daring Cooks, but if you have a few minutes, scroll through the blogroll to check out how other cooks did on the gnocchi.


Ricotta Gnocchi
(Adapted from The Zuni Cafe Cookbook: A Compendium of Recipes and Cooking Lessons from San Francisco's Beloved Restaurant)

For the gnocchi
8 ounces fresh ricotta
1 large cold egg, lightly beaten
1/2 tablespoon (1/2 ounce) unsalted butter
A few pinches of chopped lemon zest optional
2 tablespoons Parmigiano-Reggiano, grated
1/4 teaspoon salt (a little more if using kosher salt)
All-purpose flour for forming the gnocchi

For the sauce
2-3 slices prosciutto
1/4 cup extra-virgin olive oil
1/3 cup fresh basil
Kosher salt

To make the gnocchi:
To test the ricotta, take a teaspoon or so and place it on a paper towel. If you notice a very large ring of dampness forming around the ricotta after a minute or so, then the ricotta is too wet. To remove some of the moisture, line a sieve with cheesecloth or paper towels and place the ricotta in the sieve. Cover it and let it drain for at least 8 hours and up to 24 hours in the refrigerator.

Place the drained ricotta in a large bowl and mash it as best as you can with a rubber spatula or a large spoon (it’s best to use a utensil with some flexibility here). As you mash the ricotta, if you noticed that you can still see curds, then press the ricotta through a strainer to smooth it out as much as possible. Add the lightly beaten eggs to the mashed ricotta. Melt the tablespoon of butter and add to the ricotta mixture. Add the lemon zest, Parmgiano and the salt. Beat all the ingredients together very well. You should end up with a soft and fluffy batter with no streaks.

Fill a small pot with water and bring to a boil. When it boils, salt the water generously and keep it at a simmer. You will use this water to test the first gnocchi that you make to ensure that it holds together and that your gnocchi batter isn’t too damp.

In a large, shallow baking dish or on a sheet pan, make a bed of all-purpose flour that is 1/2 an inch deep. With a spatula, scrape the ricotta mixture away from the sides of the bowl and form a large mass in the center of your bowl. Using a tablespoon, scoop up about 2 to 3 teaspoons of batter and then holding the spoon at an angle, use your finger tip to gently push the ball of dough from the spoon into the bed of flour. Shake the dish gently to ensure that the flour covers the gnocchi or use your fingers to very gently dust the gnocchi with flour. Gently pick up the gnocchi and cradle it in your hand rolling it to form it in an oval as best as you can, at no point should you squeeze it. What you’re looking for is an oval lump of sorts that’s dusted in flour and plump. Gently place your gnocchi in the simmering water. It will sink and then bob to the top. From the time that it bobs to the surface, you want to cook the gnocchi until it’s just firm. This could take 3 to 5 minutes. If your gnocchi begins to fall apart, this means that the ricotta cheese was probably still too wet. You can remedy this by beating a teaspoon of egg white into your gnocchi batter. If your gnocchi batter was fluffy but the sample comes out heavy, add a teaspoon of beaten egg to the batter and beat that in. Test a second gnocchi to ensure success.

Form the rest of your gnocchi. You can put 4 to 6 gnocchi in the bed of flour at a time. But don’t overcrowd your bed of flour or you may damage your gnocchi as you coat them. Have a sheet pan ready to rest the formed gnocchi on. Line the sheet pan with wax or parchment paper and dust it with flour.

Bring a large pot of salted water to a boil and cook the remaining gnocchi and serve with the sauce.

To make the crispy prosciutto:
Preheat the oven to 350 degrees. Line a baking sheet with parchment paper and lay the prosciutto flat on the parchment. Bake for 10-12 minutes until the prosciutto is crispy. Drain on paper towels and crumble by hand.

To make the basil oil:
Roughly chop the basil and place in the bowl of a food processor. Add oil until the mixture has reached the desired consistency. Season lightly with kosher salt. (Can be made a day ahead and stored in the refrigerator in an airtight container. Bring to room temperature before using)

Stumble Upon Toolbar

Wednesday, May 13, 2009

Leek Fritters

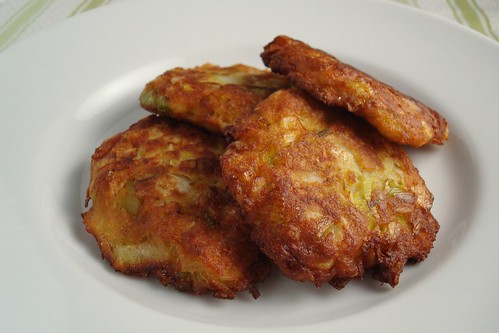
Leek Fritters

A couple of weeks ago I caught this episode of Good Food with Evan Kleiman where she made these leek fritters I knew I had to try immediately. I only wish I could go around getting all my produce at the farmers market and then have a convenient area to cook right away. Instead, I usually have to haul my stuff on the ten minute walk home, but it's so worth it. These fritters are easy to make and very tasty. As you can see in the video, no measurements are given, but it is pretty easy to eyeball. They don't really need anything than a spritz of lemon juice, but I imagine a nice yogurt dipping sauce would be fantastic with these.


Leek Fritters
(From Good Food with Evan Kleiman)

2 leeks, washed and chopped
1 egg lightly beaten
1 slice of bread soaked in water and then
Freshly shredded Parmesan cheese
Salt and pepper
Breadcrumbs as needed

Bring a large pot of salted water to a boil and add the leeks. Cook until the leeks have softened and sunk to the bottom. Drain well and pat dry.

In a medium bowl, mix together the leeks, egg, soaked bread, and Parmesan. Season with salt and pepper and add breadcrumbs as needed until the mixture comes together.

In a large skillet, heat an inch of olive oil over medium high heat. Form the leek mixture into balls and pat down. Fry the patties for 3-4 minutes per side until browned and crisp. Drain on paper towels and serve immediately.

Printable Recipe

Stumble Upon Toolbar

Tuesday, May 12, 2009

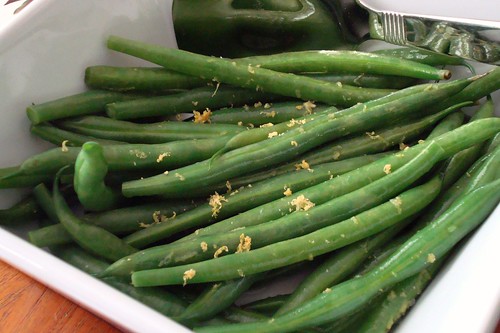
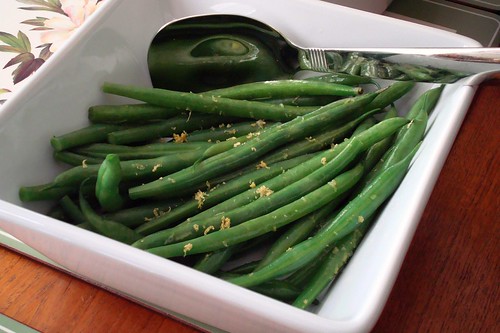
Green Beans with Lemon and Oil

Green Beans with Lemon and Oil

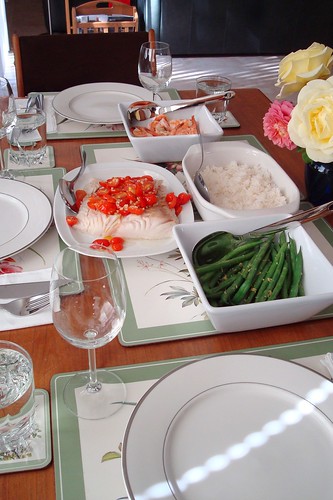
I'm back! Hope you all enjoyed your weekend. I had a nice time with my mom and sister up in the Bay Area, and I spent part of Sunday cooking up this lovely feast. We had an early dinner that consisted of sizzling shrimp with garlic, halibut with tomatoes (an Esi creation that unfortunately, I didn't get a very good picture of), these green beans, and the chocolate Valentino which I managed NOT to screw up this time around. One of the best parts of this meal was that it was really delicious, but quite simple to put together. My new goal is to have all my mise en place because I think that was a critical element in me having dinner on the table in less than an hour. I really have to remember to practice that more in my cooking. Anyway, dinner was delicious if I do say so myself. There were lots of nice, fresh spring flavors and everything complemented each other well. I suppose since I didn't get a good picture of the halibut, I am just going to have to make it again so I can share it with you.

Mother's Day Table

Green Beans with Lemon and Oil
(From Gourmet, March 2003)

Makes 4-6 servings

1 pound thin green beans such as haricot verts, trimmed
1 tablespoon extra-virgin olive oil
1/4 teaspoon salt
1 teaspoon freshly squeezed lemon juice
1/2 teaspoon lemon zest, divided

Cook the beans in a large pot of boiling salted water until crisp-tender, about 5 minutes. Drain in a colander and immediately transfer to an ice bath to stop the cooking. Drain and pat dry.

Toss the beans with oil, salt, and pepper to taste then add the lemon juice and half the zest. Serve beans sprinkled with the remaining zest.

Printable Recipe


Green Beans with Lemon and Oil

Stumble Upon Toolbar

Sunday, May 10, 2009

Happy Mother's Day


To all you wonderful mothers and to my own spectacular mother, Happy Mother's Day!!


(Image from Webweaver's Free Clip Art)

Stumble Upon Toolbar

Friday, May 8, 2009

Edamame Hummus with Wonton Wrapper Chips

Edamame Hummus

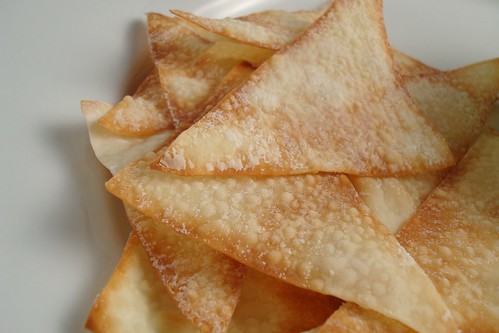
The other night when I got home from work, I was hungry, but not in the mood for a full meal. Since most of my recent meals are some combination of freezer finds and leftovers, I decided to stick with that theme for dinner. I kind of got lucky on this one. I had exactly the amount of edamame and lemon and it was a cinch to put it together so I could get down to the business of watching Gossip Girl. I loved the smooth hummus and the wonton chips were addictive. I misread the original recipe and added the oil to the hummus instead of the wonton chips, but it worked. I may decrease the amount next time though.
I'm flying up north tomorrow to celebrate my mom. Have a fantastic weekend and Happy Mother's day to all you fabulous mothers!

Baked Wonton Chips

Many people shared concern over those affected by the Santa Barbara fire. If you would like to find out what you can do to help, please click here.


Edamame Hummus with Wonton Wrapper Chips
(From Not Eating Out in NY)

Makes 1 cup of edamame and 24 wonton chips

1 cup frozen edamame
Juice of half a lemon
1 garlic clove, chopped
1 tablespoon olive oil
1/4 cup water
12 square wonton wrappers, sliced in half diagonally to 24 triangles
Toasted sesame seeds (optional)
Salt
Cooking spray

To make the chips: Preheat oven to 350 degrees. Spay a baking sheet with cooking spray or lightly coat with oil. Place the wonton triangles in a single layer on top, and spray or brush the tops with more cooking spray or oil just so that each side is entirely moistened. Sprinkle with the optional sesame seeds if using. Bake for 5-8 minutes, or until the wonton wrappers have curled at the edges and are just lightly browned. Sprinkle with salt.

To make the edamame: Place the edamame in a steamer rack (or build a steamer by putting them inside a bowl; place the bowl inside a pot with 1-2 inches of water on the bottom and a lid to hold in the steam). Steam edamame for 8-10 minutes. Remove from heat and let cool.

Combine edamame, lemon juice, garlic, oil and a sprinkle of salt in a blender or food processor and pulse several minutes, scraping down the sides of the bowl with a spatula occasionally. Add the water to help bring it to a smoother consistency as needed — adding more or less. Taste for seasoning.

Stumble Upon Toolbar

Thursday, May 7, 2009

SugarBomber

Chocolate Strawberry Ding Dong

It's hot and windy. There is a fire 90 miles away that is blowing smoke and ash in my direction. I'm tired and totally cooked something and don't feel like talking about it.

So let me tell you about something cool that I am now a part of. Last week, CitySearch launched an extension of their website called SugarBomber. If you want to find interesting (and cheap) desserts in your area...or just browse and be jealous of what other cities get to experience, check it out. I am one of their Dictators and I wrote about this chocolate strawberry ding dong from Lemonade and soon it will be posting to the site. If you like desserts and are interested in becoming a Dictator also, click here.

I'll be back tomorrow with a recipe post. I promise.

Chocolate Strawberry Ding Dong

Stumble Upon Toolbar

Wednesday, May 6, 2009

Real Margaritas

Classic Margarita

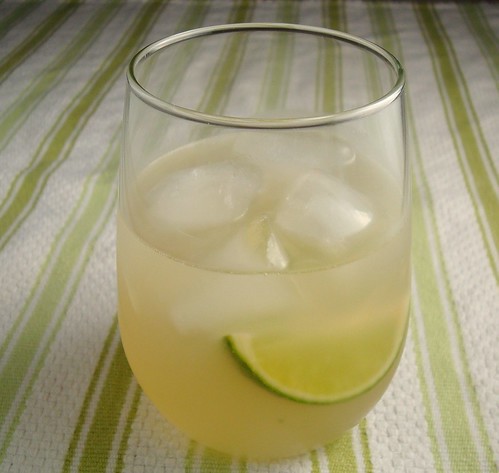
How do you like your margaritas? I prefer them on the rocks with no salt. Also, I tend to favor drinks that are more tart than sweet. It's been a while since I have had a good margarita, mostly because I prefer wine over cocktails, but I found some tequila and triple sec in my freezer so in the spirit of Cinco de Mayo, I had some margaritas with my fajitas. The biggest effort came from juicing the limes. You need a few of them (5-6) to get that half cup of juice. It's so worth it though...none of that premade stuff! I only had gold tequila, but I would recommend using silver if you have it. Either way, they are really good and definitely reminiscent of my beloved kick-ass margaritas from Marix. They are also STRONG so watch out! In a last minute TWIST, I ended up going to Marix and having a wonderful evening with some close friends. It was a great night and I hope you enjoyed yours as well.

Limes for Margaritas

Real Margaritas
(Adapted from Ina Garten)

1/2 cup freshly squeezed lime juice
2 tablespoons freshly squeezed lemon juice
1 cup Triple Sec
1 cup tequila
1/2 cup club soda, or to taste

Mix the lime juice, lemon, triple sec and tequila. Add club soda to taste and serve over ice.

Stumble Upon Toolbar

Tuesday, May 5, 2009

Chicken Fajitas with Slow Roasted Tomato Salsa

Chicken Fajitas with Slow Roasted Tomato Salsa

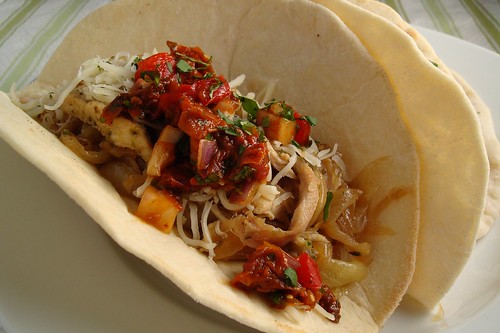
Happy Cinco de Mayo!! What do you guys do to celebrate the occasion? In college we used to just use the day as an excuse to drink all day (as if we really needed a reason). Now that I am responsible adult (please try not to laugh too hard), I just spend the day at work and maybe grab a few cocktails with friends. This year I don't have any plans, but I wanted to eat something festive over the weekend. I also found an almost full bottle of tequila and an almost full bottle of triple sec in my freezer. What goes better with margaritas than fajitas? At my favorite Tex-Mex restaurant, Marix, we like to order our margaritas "kick ass" style and our fajitas with no peppers and the onions well done. This past Saturday after I was done volunteering, I made a pitcher of margs and these fajitas. They were so yummy and worth the time browning the onions and making tortillas. Homemade tortillas are so easy to make and taste so much better than the store bought variety. I encourage you to try them sometime. I had just a few slow roasted tomatoes left so I combined them with a few things to make a really delicious and spicy salsa. This was a most excellent way to use up leftover chicken.

Chicken Fajitas with Slow Roasted Tomato Salsa

Chicken Fajitas

Chicken, cut into strips
Caramelized onions (recipe follows)
Tortillas
Slow roasted tomato salsa (recipe follows)
Shredded cheese (optional)
Sour cream (optional)

Spread chicken and onion mixture over each tortillas. Top with the toppings of your choice.

Caramelized Onions
(Adapted from Simply Recipes)

1 1/2 onions, thinly sliced
Pinch sugar
Pinch salt
Extra-virgin olive oil

Heat a large saucepan over medium-high heat. Add enough oil to cover the pan. Add the onions and stir to make sure they are all coated in oil. After 10 minutes, sprinkle the onions with salt and sugar and reduce the heat medium-low. Cook, stirring every few minutes for 30 minutes to 1 hour until the onions are rich and brown.

Slow Roasted Tomato Salsa

6-8 slow roasted tomato halves, diced
1/2 red onion, diced
Juice from 1/2 lime
1 jalapeno, seeded if desired and chopped
Kosher salt to taste

Mix everything and let sit 15 minutes to let the flavors come together.

Chicken Fajitas with Slow Roasted Tomato Salsa

Stumble Upon Toolbar