Showing posts with label rice. Show all posts

Monday, September 10, 2012

Greek Rice Bowls

Greek Rice Bowl

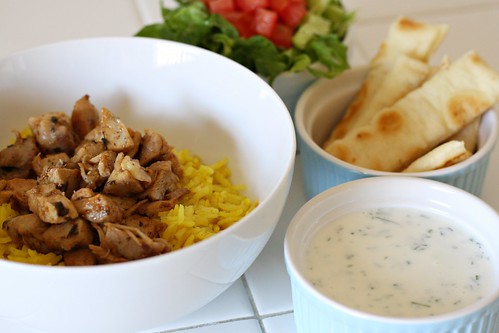
There is a little fast food restaurant near my apartment called Tzatiki Grill. I haven't been, but I hear it is like Chipotle with Greek flavors. I was intrigued by the idea of a "Greek bowl" and after my recent success with Greek nachos, I was ready to try the ingredients in a more portable lunch offering. This is an excellent diversion from the chicken and rice and salsa I normally tote to work for lunch and it feels food to change things up. The rice is based on a recipe I used to make with my mom. She made it in a similar way to fried rice, stir frying day old rice with spinach and plenty of garlic, but I have found a simpler way to make it though chopping spinach never really gets easier. Instead of having the tomatoes, cucumber, olives, and onion as separate toppings, I whipped them together for a simple relish/salsa that is excellent on it's own with tortilla or pita chips.


One year ago: Brunch at Cecconi's
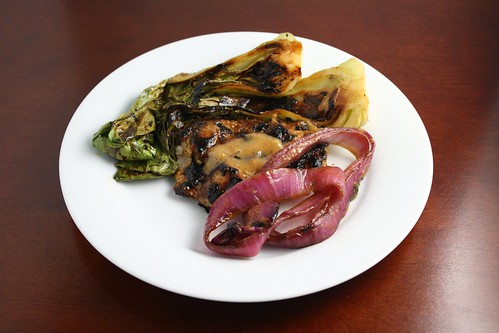
Two years ago: Grilled Sausages with Figs and Mixed Greens
Three years ago: Cubano Sandwiches
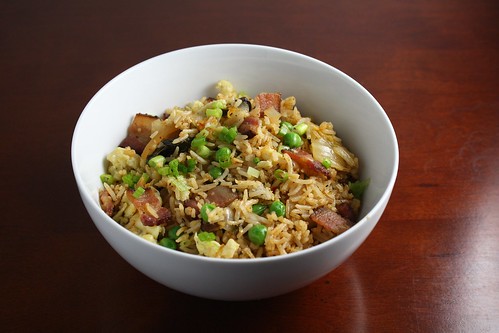
Four years ago: Sweet Chili Shrimp with Sesame Soy Rice
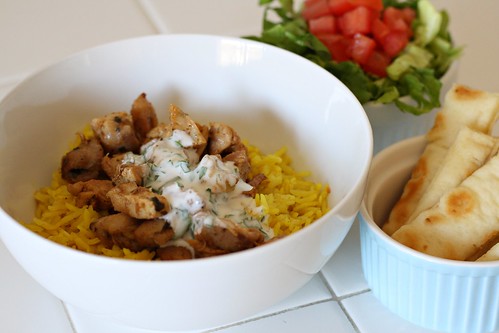
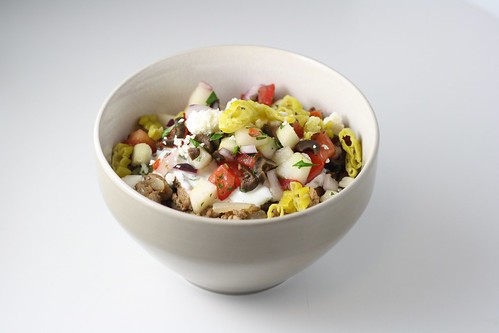

Greek Rice Bowls
(By Esi)

Makes 4 servings

2 cups spinach rice (recipe follows)
1/2 yellow onion, chopped
1 tablespoon extra-virgin olive oil
8 ounces ground turkey
1 tablespoon ground cumin
Salt and pepper

Heat the olive oil in a large skillet over medium-high heat. Add the onion and sprinkle with salt. Cook until the onion has softened, about 5 minutes, stirring occasionally. Add the ground turkey cumin. Sprinkle with salt and pepper and cook until the turkey has cooked through, about 7 minutes.
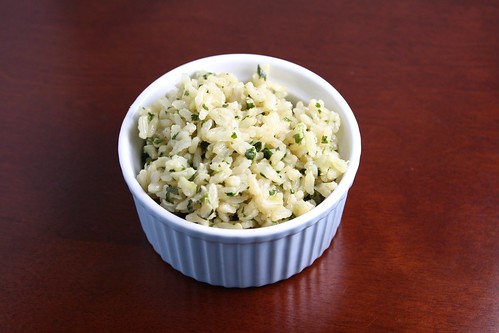
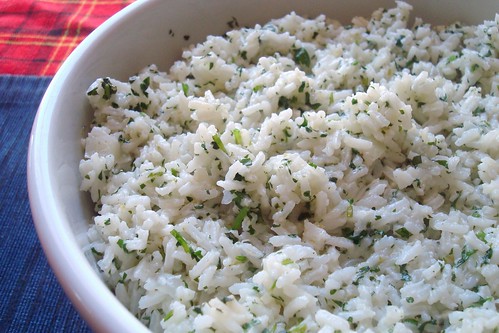
Spinach Rice
(By Esi)

Makes 2 cups

2 teaspoons extra-virgin olive oil
1/2 yellow onion, chopped
3 cloves garlic, minced
1 cup white rice
1 3/4 cups water or low sodium chicken stock
Salt to taste
1 cup finely chopped fresh spinach (you can use frozen spinach, but make sure the water is completely squeezed out)

Heat the oil in a large saucepan over medium heat.  Add the onion and cook until the onion has softened, about 5 minutes. Add the garlic and cook until fragrant, about 1 minute. Add the rice and toss to make sure it is coated in the onions, garlic, and oil. Stir constantly until the rice is toasted, about 2 minutes. Add the water and season to taste with salt. Let the mixture come to a boil then reduce to a simmer over low heat. Cover and cook for 20 minutes until the rice is cooked through. Add the chopped spinach to the pan and use a fork to simultaneously fluff the rice and mix in the spinach.

Toppings:
Tomato, Cucumber, Olive relish (recipe follows)
Tzatziki (homemade or store bought)
Crumbled Feta
Sliced pepperoncini

Tomato, Cucumber, Olive Relish
(By Esi)

Makes about 2 cups

4 Roma tomatoes, seeds scooped out and diced
1 cup peeled, seeded, and diced cucumber
1/2 cup diced red onion
1/4 cup roughly chopped black olives
1 tablespoon chopped parsley
Juice from 1 lime
Salt to taste

In a large bowl, mix the tomatoes, cucumber, red onion, olives, parsley, and lime juice. Season to taste with salt.

To assemble the bowls: Place 1/2 cup cooked spinach rice at the bottom of each bowl. Top each bowl with 2 ounces of the turkey mixture. Top each serving with tzatiki, tomato relish, feta, and sliced pepperoncini.

Printable Recipe

Stumble Upon Toolbar

Monday, June 25, 2012

Shrimp Biryani

Shrimp Biryani

Several months ago, my friend Ben made me sit with him in a bookstore while he scoped out Indian cookbooks. I couldn't complain, because the cookbook section is really the best section of the bookstore. He ended up picking a book by the goddess of Indian cooking, Madhur Jaffrey. He has raved about every recipe he has made from it. A while later, Serious Eats posted this recipe for Shrimp Biryani. I really like Indian food and don't eat it nearly as often as I should. I had also never tried cooking it and this recipe seemed like a straightforward recipe for my first attempt. Soaking the rice keeps it from getting soggy while cooking. The spices are simple, but potent and a spritz of lemon juice keeps this fresh. I loved the simple flavors in this biryani and it was much more cost-effective to make it at home versus spending a bunch of money on takeout.

This recipe comes from Madhur Jaffrey's book, At Home with Madhur Jaffrey (links to Amazon, I'm no longer a part of the affiliate program) and can be found on the Serious Eats website here.

One year ago: Blueberry Pomegranate Donuts
Two years ago: Yatai Ramen Twist at Breadbar
Three years ago: Broiled Chicken with Bacon over Egg Fried Rice
Four years ago: Pan-Seared Steak with Salsa Verde

Stumble Upon Toolbar

Monday, February 6, 2012

Serious Eats' Halal Cart-Style Chicken and Rice with White Sauce

Halal Cart-Style Chicken and Rice

Serious Eats has long been one of my favorite websites for food news, reviews, and recipes. It's one of the websites that inspired me to start blogging nearly four years ago and I turn to it often for inspiration. At the end of last year, Serious Eats published their first cookbook and did a series of posts on some of the recipes. This one caught my eye immediately. It's been a while since I've been to New York, but I have vivid memories of these Halal carts, even though I never had a chance to try them.  It's good to know I can have this deliciousness without having to fly all the way to New York. The chicken is savory and flavorful while the rice has a slight warmth. The sauce at first taste, may seem too sweet, but really works when mixed with the rice and chicken and cools everything down. I didn't have any Harissa on hand so I used Nando's peri peri sauce which worked well. I have a major aversion to iceberg lettuce so I used butter lettuce which added that nice crunch. I will definitely be making this again when I get a craving for street food at home.

Halal Cart-Style Chicken and Rice

Halal Cart-Style Chicken and Rice

One year ago: 8oz Burger Bar
Two years ago: Asian Turkey Cabbage Cups
Three years ago: Greek Turkey Burgers


Serious Eats' Halal Cart-Style Chicken and Rice with White Sauce
(Adapted from Serious Eats)

Makes 6-8 servings

*Note: The original recipe says not to marinate the chicken for more than four hours or it will turn mushy. I marinated for two hours

For the chicken:
1 1/2 tablespoons freshly squeezed lemon juice
1 1/2 teaspoons dried oregano
1/2 teaspoon ground coriander
5 garlic cloves, grated on a microplane
3 tablespoons extra-virgin olive oil
Kosher salt and freshly ground black pepper
1 3/4 pound boneless, skinless chicken thighs, trimmed of excess fat (8 thighs)
1 tablespoon canola oil

For the rice:
2 tablespoons unsalted butter
1/2 teaspoon tumeric
1/4 teaspoon ground cumin
1 1/2 cups long grain white rice
2 1/2 cups low-sodium chicken broth
Kosher salt and freshly ground black pepper

For the sauce:
1/4 cup mayonnaise
1/2 cup Greek yogurt
1 tablespoon sugar
2 tablespoons white vinegar
1 teaspoon freshly squeezed lemon juice
1/4 cup chopped fresh parsley
Kosher salt and freshly ground black pepper

For serving:
1 head butter lettuce, shredded
1 tomato, diced
Pocketless pita bread, brushed in butter, toasted, and cut into strips
Hot sauce

To make the chicken:
Whisk the lemon juice, oregano, coriander, garlic, and olive oil together in a small bowl. Season to taste with salt and pepper. Place the chicken in a large ziplock bag and add half of the marinade. Turn the chicken to coat. Marinate for at least 1 hour and up to 4 hours. Reserve the other half of the marinade in a large bowl.

Remove the chicken from the bag and pat dry with paper towels. Season the chicken with salt and pepper. In a large skillet, heat the canola oil over medium-high heat. Add the chicken and cook for ten minutes, turning once, halfway through. It may be necessary to do this in batches. Transfer the chicken to a cutting board and let the meat rest for 5 minutes.

Chop the chicken into 1/2-inch chunks. Add the chicken to the bowl with the remaining marinade and toss to combine. Cover the bowl loosely with plastic wrap and refrigerate.

To make the rice:
Heat the butter in a large Dutch oven over medium heat. Add the turmeric and cumin and cook until fragrant, about 1 minute. Add the rice and stir to coat. Cook for about 4 minutes, until the rice is lightly toasted, stirring frequently. Add the chicken stock and season to taste with salt and pepper. Bring to a boil then reduce the heat to low. Cook until the rice is tender and the liquid has absorbed, 15-20 minutes.

To make the sauce:
Whisk together the mayo, Greek yogurt, sugar, vinegar, lemon juice, and parsley. Season to taste with salt and pepper.

Return the entire contents of the chicken bowl to the skillet. Cook over medium-high heat, stirring occasionally, until heated through.

Serve the chicken on a pile of rice. Top with the white sauce and hot sauce. Serve with the lettuce, tomato, and pita strips.

Printable Recipe

Stumble Upon Toolbar

Monday, March 21, 2011

Thai-Style Chicken Biriyani

Thai-Style Chicken Biriyani

Spring has sprung! In LA, spring greeted us with something akin to a monsoon. There was thunder, heavy downpours, and oh yeah, a marathon. I celebrated by staying indoors with warm tea and a Harry Potter marathon on tv. Of course I had to make something delicious to go with all of that lazying around and I had just the perfect one pot meal to do that. This recipe is as good as any takeout and maybe better because you know exactly what is going into it. The chicken comes out so tender. In my grocery shopping rush, I bought chicken wings instead of drumsticks, but they worked out well. The spices in the rice give it warmth and the sriracha on the side gives the dish heat. Cucumbers are the perfect accompaniment to cool your mouth down. I'm sort of addicted to cucumbers lately, I'm already thinking of more fun ways I can use cucumbers this spring and summer.

Thai-Style Chicken Biriyani
(Adapted from Saveur)

Makes 6-8 servings

6 shallots, roughly chopped
8 cloves garlic, roughly chopped
1 5-inch piece of fresh ginger, peeled and roughly chopped
1 1/2 tablespons ground coriander
2 teaspoons ground cumin
1 teaspoon ground tumeric
1/2 teaspoon freshly ground black pepper
1 teaspoon kosher salt plus more to taste
6 chicken wings, separated at the joint
6 boneless skinless chicken thighs, halved crosswise
2 tablespoons peanut oil
2 1/2 cups jasmine rice
1 small Japanese cucumber, thinly sliced
Thai-style chili sauce, such as Sriracha

In a blender or food processor, combine the shallots, garlic, ginger, coriander, cumin, tumeric, 1 teaspoon of salt, and ground pepper with 1/3 cup water. Puree to a paste.

Toss the chicken and spice paste together in a large bowl until well combined. Cover the bowl with plastic wrap and let the chicken marinate for 1 hour.

Heat the oil in a large saucepan or dutch oven over medium-high heat. Add the chicken and all of the spice paste and cook, stirring occasionally until the paste is caramelized and the chicken begins to brown, about 12 minutes.

Add the rice and cook, stirring occasionally, for 1-2 minutes until the rice is lightly toasted. Add salt to taste and 2 1/4 cups water. Bring to a boil, then reduce to a simmer. Cover and cook until the rice is tender and the chicken is cooked through, about 30 minutes.

Remove the pot from the heat and allow it to sit, undisturbed, for 15 minutes. Uncover and use a fork to gently toss together the chicken and the rice. Serve immediately with the cucumbers and the hot sauce on the side.

Printable Recipe

Stumble Upon Toolbar

Monday, October 4, 2010

Bacon Kimchi Fried Rice

Bacon Kimchi Fried Rice
 
I first came across this recipe via Serious Eats, but discovered it was adapted from the fabulous Momofuku for 2 blog. As many of you know by now, I'm a fried rice a-holic. I love it and can eat it any time. I never find myself with leftover white rice, because I don't really eat a lot of white rice so I prepped the rice along with most of the other ingredients the night before. I prefer to do that so that the rice cooking can go quickly and smoothly. I also prefer to have certain things like garlic and oyster sauce in my fried rice so I had to adapt it for my taste. I love the balance of the fatty bacon with the acidic kimchi in here. I drained most of the bacon fat after reading that the Serious Eats version felt too fatty. For me, it was just perfect and I loved it so much, I made it again a week later! I'm running low on kimchi and some other Korean ingredients so it looks like I'm going to have to make another field trip to Koreatown very soon!


Bacon Kimchi Fried Rice
(Adapted from Serious Eats and Momofuku for 2)

4 slices bacon, chopped
1 small onion, diced
4 cloves garlic, minced
2 cups cold cooked rice (preferably from the day before)
1 tablespoon kimchi liquid
Oyster sauce to taste
Soy sauce to taste
3/4 cup kimchi, drained and chopped (save the liquid)
1/2 cup frozen peas, thawed
3 eggs, lightly scrambled
Salt and pepper to taste

Add the bacon to the wok and turn the heat to medium-high. Cook the bacon until crisp and remove from the pan using a slotted spoon. Drain the bacon on paper towels. Reserve about 2 tablespoons of the bacon fat in the wok and drain the rest.

Add the onion to the pan and cook until translucent. Add the garlic and cook just until the garlic becomes fragrant. Add the rice and toss to combine making sure to smooth out any clumps in the rice. Add oyster sauce and soy sauce to the rice, adjusting the seasonings to taste. If necessary add salt.

Add the kimchi, peas, and scrambled eggs, and bacon to the rice and toss well to combine. Add plenty of freshly ground black pepper and serve immediately.

Printable Recipe

Stumble Upon Toolbar

Friday, August 13, 2010

Grilled Asian Chicken with Bok Choy and Onions and Ginger-Cilantro Rice

Grilled Asian Chicken with Bok Choy and Onion

After my great success with the shrimp and sausage skewers, I was anxious to try other recipes in the June issue of Bon Appetit. I'm embarrassed that it's taken me nearly two months to share these recipes with you because they are truly easy and outstanding, but summer isn't over so you still have time to get your grill on. 

Grilled Asian Chicken with Bok Choy and Red Onions

This was one of the rare occasions when I made the full recipe because I was eager to try the accompanying recipe for the leftovers. I promise I won't take two months to share that one with you.  I only made a few changes to the recipe. To kick up the spice factor, I used a spicy mango chutney. Also, I left out the mushrooms and peppers because those are not vegetables I consume in great (or any) quantities. Lastly, in the rice, I switched out brown rice for the white. Even with the cooking time of the rice, this is a pretty quick dinner so it's nice to have for a weeknight or a weekend get together.

Ginger-Cilantro Rice

Grilled Asian Chicken with Bok Choy and Onions
(Adapted from Bon Appetit, June 2010)

Makes 4 servings plus leftovers

8 1/2-inch thick rounds red onion
4 baby bok choy, halved lengthwise
1 1/4 cups mango-sesame dressing (recipe below)
6 boneless skinless chicken breasts or thighs
Nonstick vegetable spray

Arrange the vegetables on a large, foil lined baking sheet. Brush the vegetables lightly on both sides with 1/3 cup of the mango-sesame dressing and sprinkle with salt and pepper. On a separate foil lined baking sheet, arrange the chicken and brush on both sides with an additional 1/3 cup of dressing. Sprinkle each side with salt and pepper.

Preheat a grill pan over medium high heat and spray with a bit of cooking spray. Grill the vegetables until just tender, turning occasionally, about 8 minutes. Return the vegetables to the same baking sheet.

Grill the chicken until cooked through, about 5 minutes per side. Transfer the chicken to a cutting board and let stand for 5-10 minutes. Serve the chicken on a platter with the vegetables. Serve with some of the remaining dressing.

Printable Recipe

Mango-Sesame Dressing
(Adapted from Bon Appetit, June 2010)

Makes about 2 cups of dressing

1/2 cup vegetable oil
3/4 cup mango chutney (I used spicy mango chutney)
6 tablespoons unseasoned rice vinegar
3 large garlic cloves, grated
6 3/4 teaspoons light soy sauce
1 1/2 teaspoons Dijon mustard
1 1/2 teaspoons crushed red pepper flakes

Combine all ingredients in a blender or food processor. Cover tightly and blend until the dressing is smooth. Season to taste with salt and pepper. Dressing can be made up to a week ahead of time and kept covered and chilled in the refrigerator.

Printable Recipe

Ginger-Cilantro Rice
(Adapted from Bon Appetit, June 2010)

Makes 2 generous servings

1/2 cup brown rice
1 1-inch round peeled ginger plus 1/2 teaspoon grated fresh ginger
1 cup low-sodium chicken broth
3/4 cup chopped fresh cilantro
1/2 green onion, thinly sliced
1 tablespoon vegetable oil
1 1/2 teaspoons toasted sesame oil
1/2 teaspoon unseasoned rice vinegar
Salt and pepper to taste

Combine the rice and ginger rounds in a large saucepan. Add the broth and sprinkle with salt. Bring the rice to a boil, then reduce to a simmer. Cover and simmer until the rice is tender, about 30-40 minutes.

Meanwhile, combine the chipped cilantro, green onion, grated ginger, both oils, and the rice vinegar in a small food processor. Blend until almost smooth and season to taste with salt and pepper.

Transfer the rice to a bowl and fluff with a fork. Remove the ginger rounds. Toss the rice with the cilantro oil and serve.

Printable Recipe

Stumble Upon Toolbar

Thursday, June 10, 2010

Fried Rice with Beef

Fried Rice with Beef

In the last week I have cooked little to not at all. Luckily, I have a few saved recipes to share. I made this several weeks ago, but I'm just now getting around to sharing it. After a long week at work, I like to treat myself to a little takeout, but sometimes I prefer to recreate takeout classics at home. It's much cheaper and I control exactly what goes into my food. This time I chose to use some grass fed beef from the farmers market and a farm fresh egg. Since I prepped all my ingredients the previous night, this meal was a cinch and came together super fast. I preferred to top my portion with a fried egg so that creamy yolk could get all mixed up with the rice, but subsequent servings had an egg scrambled in. This is just one of a million ways to serve fried rice. I'm thinking my next version will have some more seasonal vegetables...


Fried Rice with Beef
(Adapted from Sea Salt with Food)


Makes 4 servings

200 grams ground chuck
1 tablespoon peanut oil
1/2 yellow onion, diced
4 cloves garlic, chopped
2 cups cold cooked rice
Soy sauce to taste
Oyster sauce to taste
4 Eggs
1-2 scallions, thinly sliced
Kosher salt to taste
Ground black pepper

In a large skillet or wok, heat the oil over medium high heat. Add the beef and cook until the beef is cooked through, season lightly with salt and pepper. Using a slotted spoon, remove the beef from the pan and set aside.

Add the yellow onion and garlic to the pan. Cook for about 5 minutes until the onions have softened slightly, but still have some bite. Add the rice to the pan and stir to combine. Add soy sauce and oyster sauce and adjust the seasonings to taste. Add the beef back to the pan and stir to combine. Season with salt as needed and plenty of freshly ground black pepper.

In a small frying pan, fry the eggs. Alternately, you can scramble the eggs and stir them in to the rice. Serve the rice topped with a fried egg and Top each serving with some of the scallions.

Printable Recipe

Stumble Upon Toolbar

Thursday, June 3, 2010

Brown Rice Pudding

Brown Rice Pudding with Strawberries

I always have friends emailing me requests for specific recipes. Sometimes I get to them right away...other times it takes me quite a bit longer depending on my mood. Two days ago, I got a request asking me for a brown rice pudding. I must admit, I had never even considered the idea before. I like rice pudding as much as the next person, but it's not something I make often because I never find myself with extra rice around. Usually if I have extra rice, it goes towards a fried rice recipe, but I was intrigued at making a pudding from it. Some of my all time favorite recipes come from ingredients I already have on hand and this pudding was no exception. I literally had everything in my kitchen so when I got off work a little earlier yesterday, I immediately set out to make this pudding. Most of the time spent on this recipe comes from cooking the brown rice, but if you already have cooked rice on hand, this comes together in mere minutes. I may use a touch less sugar next time, but man is this great for dessert...or breakfast! The cinnamon gives it some warmth, but the lemon zest brightens it up. This is creamy and decadent tasting, but with way less guilt than a regular full fat dessert. I'm so excited to try this again with a vanilla bean or extract to change up the flavor.

Brown Rice Pudding with Strawberries

Final note, there is still time to enter my blogiversary giveaway! It's a good one, check it out before it's too late!!!

Brown Rice Pudding with Strawberries
(Adapted from A Cozy Kitchen)


Makes 2 generous servings

1 cup cooked brown rice
1 cup low fat milk
1/4 cup sugar
1/2 teaspoon grated lemon zest
1/2 teaspoon warm cinnamon
Pinch of salt
Fresh strawberries, sliced for serving

In a large saucepan over medium low heat, combine the rice, milk, sugar, lemon zest, cinnamon and salt. Cook, stirring continuously until the mixture is thick and creamy, about 15-20 minutes.

Serve warm, topped with strawberries.

Printable Recipe

Stumble Upon Toolbar

Monday, February 8, 2010

Ginger Fried Rice

Ginger Fried Rice

So last week I made the turkey cabbage cups as an appetizer to this rice...and then I saw that a few bloggers had already posted it. I always say there is beauty in simplicity and this rice is the epitome of that. It uses basic ingredients and simple flavors in a combination that cannot be beat. I love fried rice in pretty much any form and I make it often, yet I was so excited to try this recipe. I always have a knob of ginger in the freezer and I definitely always have at least three bulbs of garlic on hand. I am a bit of a wimp when it comes to frying garlic because I fear it burning so it didn't get quite as brown as it should have, but that does not mean the mixture didn't impart a wonderful savory flavor into the rice. I love using leeks instead of green onions in the rice and though I was worried about not mixing the soy sauce into the rice, it made a lovely topping with the egg and sesame oil. I am still without a nonstick pan so I poached my egg rather than frying it. The velvety yolk was perfect with the garlic tinted rice and crunchy topping. I will definitely make this recipe again and who knows...maybe I will even get daring and cook the garlic and ginger mixture a little longer.


Ginger Fried Rice


Ginger Fried Rice
(Adapted from the New York Times)


Makes 2 servings

2 tablespoons peanut oil
1 tablespoons minced garlic
1 tablespoon minced ginger
Salt
1 cup thinly sliced leeks, white and light green parts only, rinsed and dried
2 cups day-old cooked rice, preferably jasmine, at room temperature
2 large eggs
1 teaspoon sesame oil
2 teaspoons soy sauce

In a large skillet, heat the peanut oil over medium heat. Add garlic and ginger and cook, stirring occasionally, until crisp and brown. With a slotted spoon, transfer to paper towels and salt lightly.

Reduce heat under skillet to medium-low and add the leeks. Cook about 10 minutes, stirring occasionally, until very tender but not browned. Season lightly with salt.

Raise heat to medium and add rice. Cook, stirring well, until heated through. Season to taste with salt.

In a small saucepan poach the eggs. (You can also fry the eggs in a nonstick skillet)

Divide rice among two dishes. Top each with an egg and drizzle with 1/2 teaspoon sesame oil and 1 teaspoon soy sauce. Sprinkle crisped garlic and ginger over everything and serve.

Printable Recipe

Stumble Upon Toolbar

Tuesday, November 3, 2009

Saffron Rice with Green Peas

Saffron Rice with Peas


Here is my accompaniment for the Albondigas I had over the weekend. This rice is so easy and pretty too. Of course after the fact, I saw Giada make a similar recipe with pancetta. I guess I'll have to try that next time. This rice was great with the meatballs, but I am looking forward to having it again with all kinds of meats and maybe even some kind of garbanzo bean mixture. This is easily made into a vegetarian dish by using vegetable stock or water in place of the chicken stock.


Saffron Rice with Peas
(Based on Jehan Can Cook)

Makes 2+ servings

1/2 small onion, diced
2 teaspoons extra-virgin olive oil
3 cloves garlic, minced
1 cup rice
Pinch saffron strands
1 1/2 cups chicken stock
Salt and pepper to taste
1/2 cup frozen green peas

Heat the olive oil in a medium saucepan over medium heat. Add the onions and cook until soft. Add the garlic and cook until fragrant, another minute. Add the rice and toast until lightly golden.

Carefully add the chicken stock and saffron. Bring to a boil, season with salt and pepper, then reduce to a simmer and cover. Cook on low for about 15 minutes. Add the peas and cook another 5 minutes until the peas are thawed and the rice is cooked through.

Printable Recipe

Stumble Upon Toolbar

Tuesday, September 1, 2009

Cilantro-Lime Rice and Cuban-Style Black Beans

Cilantro Lime Rice

Here are two really easy and insanely flavorful side dishes that went along with the vaca frita with a twist that I will be posting at a later time. These are also really quick and great to have on hand for any time. I imagine they would go great with some grilled chicken or fish for a fast meal.

Cuban-Style Black Beans


Cilantro-Lime Rice
(Adapted from Closet Cooking)

Makes 8+ servings

2 tablespoons canola oil
1 onion, chopped
2 cloves garlic, minced
2 cups long grained rice
4 cups water
2 handfuls cilantro, chopped
2 limes zested and juiced

Heat the oil in a saucepan over medium heat. Add the onion and saute until tender, about 5-7 minutes until the onions have softened. Add the garlic and saute until fragrant, about a minute. Add the rice and toast in the oil for a few 2-3 minutes.

Add the water, bring to a boil, reduce the heat and simmer, covered until tender, about 20 minutes for white rice or 40-50 minutes for brown. Remove from the heat and mix in the cilantro, lime juice and zest.

Printable Recipe

Cuban-Style Black Beans
(Adapted from Bon Appetit, September 1997)

Makes 6-8 servings

1/4 cup olive oil
1 large onion, chopped
6 large garlic cloves, chopped
1 tablespoon dried oregano
3 15- to 16-ounce cans black beans, rinsed, drained
3/4 cup canned vegetable broth or water
1 1/2 tablespoons cider vinegar

Heat oil in heavy large saucepan over medium heat. Add onion, bell pepper, garlic and oregano and sauté until vegetables begin to soften, about 5 minutes. Add 1 cup of beans to pan. Using back of fork, mash beans coarsely. Add remaining beans, broth and vinegar and simmer until mixture thickens and flavors blend, stirring occasionally, about 15 minutes. Mix in sugar, if desired. Season beans to taste with salt and pepper and serve.

Printable Recipe

Stumble Upon Toolbar

Saturday, June 6, 2009

Broiled Chicken with Bacon over Egg Fried Rice

Broiled Chicken with Bacon over Egg Fried Rice

Hello friends! How I have missed you. I know it has only been a couple of days, but it feels like forever to me. I am still getting used to being back in the super busy world of Hollywoodland...I have always been in the biz, but but in case you didn't know, I am getting adjusted to being at a new, old job. I am so glad to have found something so quickly in this economy, but let me tell ya. I am BEAT when I get home. I barely have time to catch up on a day's reading before I crawl into bed and get ready to do it all over again the next day. Anyway, I knew this was coming and I am just going to have to find my groove, but it could take a while so bear with me.

On to the food. After a week of eating oatmeal, carrots, and leftover onion tart, I was ready for something different last night. I have mentioned it before, but on Friday nights I want a nice combination of naughty and yet quick. This recipe was both those things despite only prepping the rice the night before. It is delicious and flavorful, especially with a few additions like oyster sauce and lots of fresh black pepper. On my last major TJs trip, I accidentally bought organic chicken thighs instead of breasts, but I had some breast tenders leftover from a while ago so I ended up using a mix in this recipe. They were really good and a nice way to prepare the chicken while getting on with the rest of the dish. I always like to add some garlic and oyster sauce to my fried rice and a bunch of fresh ground black pepper was all I need to make this a home run. I had a lot of fun making this dish and I am excited to have some free time tomorrow (in between script coverage) to scroll through the most recent issues of Gourmet and Saveur to come up with even more great things to share with you all soon. Enjoy your weekend!

Broiled Chicken with Bacon over Egg Fried Rice

Broiled Chicken with Bacon Over Egg Fried Rice
(Adapted from Gourmet, June 2009)

Makes 2-4 servings

2 skinless boneless chicken thighs, cut into 1-inch pieces (I used one chicken thigh and one chicken breast)
2 bacon slices, cut into 1-inch pieces
Salt and pepper
Vegetable oil
1 large egg, lightly beaten
1/4 teaspoon toasted sesame oil
3 scallions, chopped
3 cloves garlic, minced
2 cups chilled cooked white rice
1 1/2 teaspoons soy sauce
1 1/2 teaspoons oyster sauce

Preheat broiler.

Toss chicken, and bacon with 1/2 tablespoon vegetable oil and a scant 1/2 teaspoon each of salt and pepper in a 4-sided sheet pan lined with foil. Broil 4 to 5 inches from heat, stirring once or twice, until chicken is just cooked through, about 10 minutes.

Meanwhile, heat a bit of oil in a large wok or nonstick skillet. Add the egg and cook through. Remove the egg from the heat and set aside. Add the sesame oil, scallions and garlic and cook over high heat until fragrant, about 30 seconds adding more vegetable oil if necessary. Add the rice and toss until well-combined. Add the soy sauce, oyster sauce and a pinch of salt and pepper. Toss well until everything is combined. Add the egg back into the mixture and toss well.

Serve chicken with rice.
Printable Recipe

Stumble Upon Toolbar

Friday, March 13, 2009

Yeung Chow Fried Rice

Yeung Chow Fried Rice

Those of you that shop at Trader Joes, do you read the Fearless Flyer newsletter? Sometimes I just ignore it, but in the most recent one, I couldn't help but notice some cool new things. The Santorini egg white salad and the BBQ pork are two of the things that stuck out to me. I downed the egg white salad in about five minutes flat and I froze the pork for another day. In a recent effort to clean my freezer, I thawed the pork and used some of it in this rice. Since I plan my meals ahead of time (for the most part), I made the rice the night before which made this a really quick recipe to prepare. I messed up a bit when adding the egg, so the egg was kind of mixed in to the rice versus being scrambled, but thankfully it didn't make the dish soggy. It was so easy and I have all the ingredients on hand so I am thinking about doing this again soon.


Are you guys doing anything fun for your weekend? Spring is almost here! Get out and enjoy it.


Yeung Chow Fried Rice
(Adapted from Doesn't TaZte Like Chicken)

1/2 cup diced BBQ pork
1/2 cup of cooked shrimp
1/2 cup of green peas
1 egg
2 cups cold rice
3 green onions, thinly sliced
3 garlic cloves, minced
Freshly ground pepper
Canola oil
1 tablespoon low-sodium soy sauce
1 tablespoon oyster sauce


In a non stick pan over high heat, stir fry BBQ pork for a minute.

Add in shrimp and stir fry quickly.

Add in green peas and freshly ground pepper, stir fry for a minute. Put all ingredients into a bowl

Put 1 tbsp of oil in the pan. Add the garlic and half of the green onions and cook until fragrant, stirring continuously. Add the rice into the pan and toss to combine. Turn the heat to medium and fry the rice until each grain is separated. Turn the heat to high and crack an egg in the middle of the rice. Very quickly, scramble the egg and mix it into the rice. Stir fry the rice until the egg has been cooked, about 1 minute. Put the soy sauce and oyster sauce in the middle of the rice and mix until combined.

Add the shrimp, BBQ pork and peas into the rice. Stir fry until the ingredients and rice are mixed well together. Turn off the heat when done and mix in the rest of the green onion.

Stumble Upon Toolbar

Monday, October 6, 2008

Shrimp Fried Rice

I used to like ordering take out (or delivery in my case) on Friday nights after a long week of work. Now, even though it takes a while to prepare, I like making my own versions of my favorites. This past Friday, I was in the mood for some rice. I actually had a whole menu planned with other things, but I went out the night before and was in no mood to prep a bunch of different recipes. Just one would be fine that night. I settled on Jaden's Shrimp Fried Rice which I found on Simply Recipes. I had an inkling I would be in the mood for this so I actually cooked the rice the night before. I prefer a drier rice so I did 1 cup of rice for 1 and 3/4 cup of water. Overall, this was a really simple and delicious recipe that didn't take to long to make. The only change I made was adding a little garlic to the mix because there are few foods (besides desserts) that I can eat without garlic. I am definitely going to be making this often.


Shrimp Fried Rice
(From Jaden Hair for Simply Recipes)

12 raw shrimp, shelled and deveined
1/2 teaspoon kosher salt
freshly ground black pepper
1/2 teaspoon cornstarch
2 tablespoons cooking oil, divided
2 eggs, lightly beaten
3 stalks green onion, chopped
2 cups leftover rice
1/2 cup frozen peas
1 tablespoon soy sauce
1/2 teaspoon sesame oil


In a bowl, toss the shrimp with the salt, pepper and cornstarch. Let marinate for 10 minutes at room temperature. Heat a wok or large sauté pan on high heat. When the pan is hot enough for a bead of water to instantly sizzle and evaporate, add just 1 tablespoon of the cooking oil and swirl to coat pan.

Add the shrimp, quickly spreading out around the cooking surface area so that they are not overlapping. Let fry, untouched for 30 seconds. Flip over and let the other side fry for 30 seconds, or until about 80% cooked through. Remove the shrimp from the pan onto a plate, leaving as much oil in the pan as possible.

Turn the heat to medium, let the pan heat up again. Add the eggs, stirring in a quick motion to break up and scramble the eggs. When the eggs are almost cooked through (they should still be slightly runny in the middle), dish out of the pan into the same plate as the cooked shrimp.

Use paper towels to wipe the same wok or sauté pan clean and return to high heat with the remaining 1 tablespoon of cooking oil, swirling to coat. When the oil is very hot, add the garlic and green onions and fry until fragrant, about 15 seconds. Add in the rice and stir well to mix in the green onions throughout. Spread the rice all around the wok surface area and let the rice heat up, untouched until you hear the bottoms of the grains sizzle, about 1-2 minutes. Use the spatula to toss the rice, again spreading the rice out over the surface of wok.

Drizzle the soy sauce all around the rice and toss. Add the peas, the cooked eggs, shrimp and sesame oil, tossing to mix the rice evenly with all of the ingredients. Let everything heat back up again. Taste and add an additional 1 teaspoon of soy sauce if needed.

Stumble Upon Toolbar

Sunday, June 8, 2008

Jollof Rice with Fresh Pepper

I always say my mom's cooking is my favorite. I can only hope that I will be able to have half of her skills someday. My favorite meal ever is jollof rice with chicken or fish and every time I go home, I eat the same thing for three days straight...literally. Jollof is similar to a Spanish rice, but with slightly different seasonings. It is a great one pot meal. Today I went to go celebrate Gay Pride with my boys, but by the end of the parade, I was starving and was in no mood to consume a ten dollar slice of pizza. I came home and made this with my mom's recipe for fresh pepper. In Ghanaian cooking we have something called "shitoh" which is a super spicy cooked condiment. I have never known the recipe for that, but once in a while I get a craving for fresh pepper and fish. Fresh pepper is like a spicy, less chunky salsa. It is actually really good with chips.

Jollof Rice

1 14oz can diced tomatoes in sauce
1 c white rice
one white onion, thinly sliced
1 chicken bullion cube
about 1 tsp cumin
about 1 tsp ground cayenne pepper
3 cloves garlic, minced
salt and pepper to taste
canola oil

Pulse diced tomatoes in a blender until almost smooth. In a large pot, saute onions until soft but not browned. Add garlic and season with salt and pepper. Cook for about a minute and then add tomatoes. Add bullion, cayenne, cumin, salt and pepper. Simmer until sauce has thickened then add the rice. Add about 3/4 c of water and bring to a boil, reduce heat and simmer for 20 to 25 minutes until rice is fully cooked, stirring occasionally.

Ghanaian Fresh Pepper

1 beefsteak tomato
1/4 onion
1/2 habenero pepper*
salt

Place all ingredients in a blender and pulse until almost smooth.

*I love super spicy food so 1/2 a habenero with the seeds was perfect for me, but if you like a weaker spice replace the habenero with a red chili or a pinch of red chili flakes.

Stumble Upon Toolbar