Long ago, it became a tradition for me to put a delectable dessert up on this site in honor of my birthday. I couldn't break that tradition this year, even though I don't write here nearly as often. Even though cheesecake has become one of my favorite desserts in the last couple of years, I didn't actually make these bars for my birthday. I made them about a month ago for a dinner party, but they are festive and special enough for any kind of occasion.
One year ago: Salted, Malted Brown Butter Rice Krispie Treats
Two years ago: Chocolate Peanut Butter Cake
Three years a go: Tin Roof Ice Cream Cake
Four years ago: Chocolate Cupcakes with Cream Filling
Five years ago: Yellow Cake with Chocolate Buttercream
Six years ago: Root Beer Cupcakes
Seven years ago: Chocolate Guinness Cupcakes
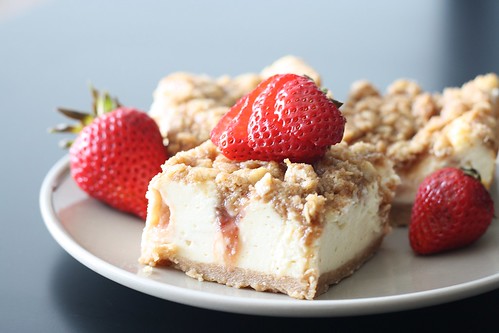
Strawberry Cheesecake Bars
(Adapted from Tastes of Lizzy T's and Mel's Kitchen Cafe)
Makes 9 large bars
For the crust:
1 cup all purpose flour
1/4 cup brown sugar
1/8 teaspoon salt
1/4 teaspoon cinnamon
8 tablespoons unsalted butter at room temperature
For the cheesecake Filling:
16 ounces cream cheese at room temperature
1/2 cup sugar
2 eggs at room temperature
1 teaspoon vanilla
1/4-1/2 cup strawberry preserves
For the streusel topping:
1/2 cup brown sugar
1/2 cup all purpose flour
1/4 teaspoon cinnamon
1/4 cup old fashioned oats
6 tablespoons unsalted butter at room temperature
Preheat the oven to 350 degrees. Line an 8x8 baking pan with foil and spray with baking spray.
To make the crust, mix the flour, brown sugar, salt and cinnamon together in a medium bowl. Add the butter and mix until crumbly, but combined. Press the crust into the bottom of the pan in an even layer. Bake for 8-10 minutes until the crust is lightly browned.
To make the cheesecake filling, beat the cream cheese and sugar in a large bowl with a hand mixer until smooth. Add the eggs one at a time and then the vanilla. Set the cheesecake filling aside.
To make the streusel, mix the brown sugar, flour, cinnamon and oats until combined, but crumbly.
Pour the cheesecake over the crust. Dollop the strawberry preserves over the cheesecake. Use a knife or skewer to swirl the preservers into the cheesecake*. Sprinkle the streusel topping over the cheesecake.
Bake for 40-50 minutes or until a clean knife inserted in the middle of the pan comes out mostly clean. Transfer the pan to a wire rack to cool for 30 minutes. Transfer to the refrigerator to set the bars for at least four hours or preferably overnight. Cut the bars into squares and serve.
*This is easier to do if the preserves are slightly warmed. 10 seconds in a microwave should be sufficient.
Printable Recipe


