Tuesday, March 30, 2010

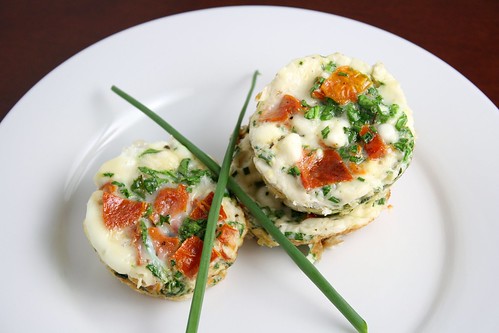
Mini Egg White Fritattas

Mini Egg White Fritattas

After the crack pie, I was left with a few egg whites that I didn't want to go to waste. I was thisclose to making macarons, but I ended up saving that failure for another time. Instead, I remembered these adorable little fritattas that Gaby made. I am all about the portable breakfasts during the work week and these fritattas take about two seconds to whip together. Plus, you can throw whatever you have laying around into them and chances are, it will turn out amazing. I went with some spinach, chives, and slow roasted tomatoes that I made months ago and have been lurking in my freezer ever since. I was so pleased with how these turned out that I am constantly thinking of new fritatta ideas. I am pretty sure the next attempt will include my favorite spring vegetable asparagus. I just can't wait to make these again!

Mini Egg White Fritattas
(Adapted from What's Gaby Cooking)


Makes 4 mini fritattas

4 egg whites, lightly beaten
Salt and pepper
1 tablespoon chopped chives
2 tablespoons chopped spinach
4 slow roasted tomato halves, diced
1-2 tablespoons crumbled feta

Preheat the oven to 350 degrees and lightly spray a muffin pan with nonstick spray.

In a medium bowl the egg whites with a large pinch of salt and a small pinch of pepper. Add the chives, spinach, tomato halves and feta to the bowl and divided the mixture between the muffin tins. Bake for 14-18 minutes until the whites have set.

Let the fritattas cool in the pan for about 10 minutes. Run a small knife alongside each fritatta to release it from the pan. Serve warm.

Printable Recipe

Stumble Upon Toolbar

Sunday, March 28, 2010

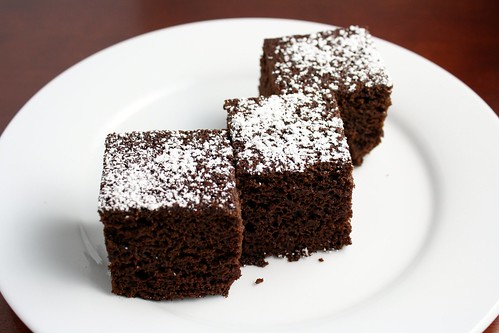
Mexican Chocolate Cake

Mexican Chocolate Cake

Sometimes I make a recipe and share it with you right away. Sometimes, I make something and it takes over a month to share it with you. Such is the case with this cake...and at least five other recipes I have waiting in my Blogger queue. I really don't have a good excuse for not sharing these except for the fact that I am a busy gal and sometimes I get very distracted. I'm not sure why it took me so long to share this cake with you, but I am going to go ahead and blame it on the pilot season insanity I was experiencing just a few short weeks ago. Well, things have calmed down majorly and I am here to tell you to make this cake. It's full of interesting spices and by a happy mistake made by the original tester, it's FAT FREE!! This cake keeps very well in an air tight container and I found it to be even better the next day. It's surprisingly moist for something that can be called fat free. However, fair warning, just because this cake is fat free does not mean it is sugar free. Proceed with caution. I baked this in a square pan so I could cut easy slices and share with my coworkers as I normally do with desserts unless said treat is drenched with lemon and covered with cream cheese glaze. This cake was up against my mom's, pineapple zucchini bread so I had fair competition, but I think I rose to the occasion.

Mexican Chocolate Cake
(From Serious Eats as adapted from Real Simple)


Makes 10 servings

1 1/2 cups all-purpose flour
1 cups sugar
1/2 cup unsweetened cocoa powder
2 teaspoons cinnamon
1 teaspoon baking soda
1/4 teaspoon cayenne pepper or chili powder
1/4 teaspoon salt
1 tablespoon balsamic vinegar
1 tablespoon vanilla extract
1 cup cold water

Preheat oven to 350 degrees.

In a large mixing bowl, whisk together flour, sugar, cocoa powder, cinnamon, baking soda, cayenne, and salt. Make two small wells in the mixture. In one, pour in the vinegar. In the other, pour in the vanilla extract. Pour cold water over everything. Stir until moistened and a only a little lumpy.

Pour batter into an 8-inch pan. Bake for 30 or 35 minutes, or until a toothpick inserted in the center of the cake comes out clean. Cool for 10 minutes in the pan, then carefully pry out and finish cooling on a wire rack.

Printable Recipe

Stumble Upon Toolbar

Friday, March 26, 2010

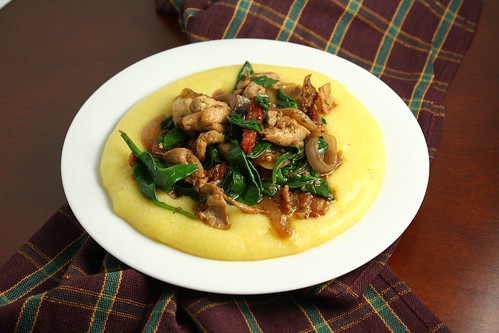
Chicken with Bacon and Sun-Dried Tomatoes

Chicken with Bacon and Sun-Dried Tomatoes

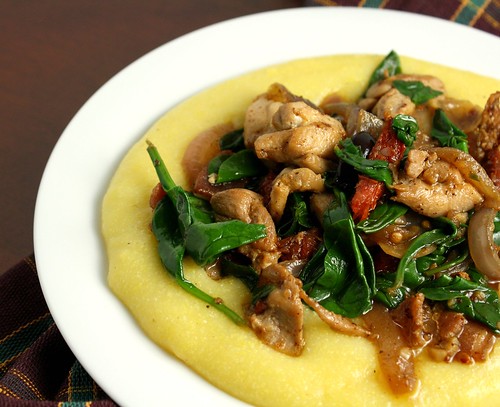
See Diana?! I do post things other than desserts. Such as really simple and really delicious dinners for one...or two if you so desire. I saw this last week and made it a couple of days later. I was able to use up some kitchen staples. I decided to up the green factor by throwing in some baby spinach I got at the Santa Monica farmers market earlier that day. I decided to prove my agility by making this all at once and it really helped to have all of my ingredients in place. This is a great meal to have on a weeknight and really filling without weighing you down. I just love polenta, but I did think the amount here could have served four rather than two.

Chicken with Bacon and Sun-Dried Tomatoes


Chicken with Bacon and Sun-Dried Tomatoes
(Adapted from Solo Suppers: Simple Delicious Meals to Cook for Yourself as found on Serious Eats)


Makes 2-3 servings

1 cup cornmeal
4 slices of bacon, cut into 1/4-inch strips
1-2 teaspoons olive oil, or as needed (I used the oil from the sun-dried tomatoes)
1 boneless chicken breast or 2 thighs, cut into 1-inch chunks
1 medium red onion, cut into 1/4 inch slices
2 tablespoons oil-packed sun-dried tomatoes, cut into narrow strips
3 small cloves garlic, peeled and minced
1/3 cup chicken stock
2-3 handfuls of baby spinach
2 tablespoons kalamata olives, sliced (optional)

To prepare the polenta, heat 5 cups of water and a good pinch of salt in a saucepan. Once boiling, whisk in the cornmeal in a slow stream, continuing to whisk vigorously until it's all added. Continue cooking and whisking until it's too thick to whisk, then switch to a wooden spoon. Cook over low heat, stirring occasionally, until the polenta is soft and thick, about the time to prepare the rest of the recipe. More water may be added if the polenta is too thick.

In saute pan, cook the bacon over medium heat in a bit of olive oil until the fat begins to render and it is beginning to crisp. Remove with a slotted spoon, leaving the fat behind.

Turn the heat to medium-high and, if needed, add some olive oil to the pan to cook the chicken (it depends on how much fat the bacon rendered). Cook the chicken pieces until golden all over and just cooked through. Season with salt and pepper. Remove with a slotted spoon to a separate plate.

Add the onion and cook until golden, about ten minutes, then stir in the bacon, the sun-dried tomatoes, and the garlic. Cook for two minutes, then add the chicken stock and scrape up the brown bits in the pan. Add the spinach, and cook for a couple of minutes until the spinach has slightly wilted. Season to taste with salt and pepper. Allow to reduce a little, then stir in the chicken and bacon to the pan. Once heated through, spoon the polenta onto plates and top with the chicken.

Printable Recipe

Stumble Upon Toolbar

Tuesday, March 23, 2010

Sticky Meyer Lemon Rolls

Sticky Meyer Lemon Rolls

A while back I was drooling over this coffee cake. Before I even got a chance to make it, the wonderful folks at The Kitchn found a way to make it even better. I've only had breakfast rolls in the cinnamon variety so this fruit version was intriguing. Plus, I got to use the last of the Meyer lemons gifted to me by Mary. These rolls are amazing, sticky, sweet (but not too sweet) and so decadent. The lemon flavor isn't overwhelming and there are enough spices to balance it out. Next time I will for sure bake up the whole batch to share with my greedy coworkers instead of hoarding it all to myself...I mean, sharing with my neighbors. Now I have to go to the gym because we all know where these rolls will go straight to.

Sticky Meyer Lemon Rolls

I liked these so much, I couldn't stop photographing them

Sticky Meyer Lemon Rolls

Sticky Meyer Lemon Rolls
(Adapted from The Kitchn)


Makes 6-8 rolls

Lemon Roll Dough
1 1/4 teaspoons yeast
 (not fast acting)
6 tablespoons milk, warmed to about 100 degrees
4 tablespoons unsalted butter, softened
2 tablespoons white sugar
1 teaspoon vanilla extract
2 1/4 cups flour
1/4 teaspoon salt
Scant 1/4 teaspoon nutmeg
Zest of 1 lemon
1 egg

Sticky Lemon Filling
1/2 cup sugar
Dash of ground nutmeg
1/4 teaspoon powdered ginger
1 lemon zested and juiced
2 tablespoons unsalted butter, softened at room temperature

Lemon Cream Cheese Glaze
2 ounces cream cheese, softened
Juice of 1/2 lemon
1/2 cup powdered sugar
Zest of 1/2 lemon

To make the dough
In the bowl of a stand mixer sprinkle the yeast over the warmed milk and let it sit for a couple minutes. With the mixer paddle, stir in the softened butter, sugar, vanilla, and 1/2 cup of the flour. Stir in the salt, nutmeg, and lemon zest. Stir in the eggs and enough of the remaining flour to make a soft yet sticky dough.

Switch to the dough hook and knead for about 5 minutes, or until the dough is elastic and pliable.

Spray the top of the dough with vegetable oil, and turn the dough over so it is coated in oil. Cover the bowl with plastic wrap and a towel and let the dough rise until nearly doubled, about an hour.

To make the lemon filling:
In a small bowl, mix the sugar with the nutmeg and ginger, and butter.

Lightly grease an 8x8 inch baking dish with baking spray or butter. On a floured surface pat the dough out into a large yet still thick rectangle. Spread evenly with the butter-lemon mixture. Roll the dough up tightly, starting from the top long end. Cut the long dough roll into even rolls, about 2-inched wide, and place them, cut side up, in the prepared baking dish.

Cover the rolls with a towel and let them rise for an hour or until puffy and nearly doubled. If you want to prepare these ahead of time, place them in the refrigerator, then let them rise at room temperature for an hour before you want to bake them.

Heat the oven to 350 degrees. Place the rolls in the oven and bake for 25-35 minutes or until a thermometer inserted into a center roll reads 190 degrees.

While the rolls are baking, prepare the glaze. With a mixer or by hand, whip the cream cheese until light and fluffy. Add the lemon juice and blend until well combined. Add the powdered sugar and blend until smooth and creamy.

When the rolls are done and slightly cooled, smear them with the cream cheese glaze, and sprinkle the zest of 1/2 a lemon over top to garnish. Serve while warm.

Printable Recipe

Stumble Upon Toolbar

Monday, March 22, 2010

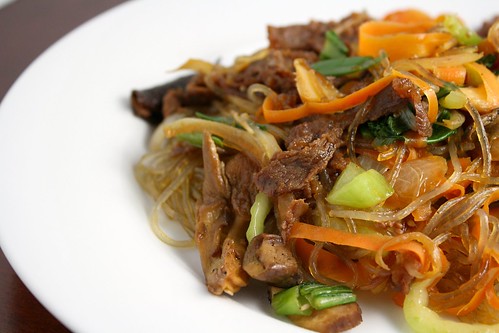
Japchae with Beef Bulgogi

Japchae with Bulgogi

I think I may have been Korean in another life. Lately, I just can't get enough Korean food. I remember the first time I had japchae at a friend's birthday party many many years ago. It was so good, I could not stop eating it. I had no idea it was so easy to recreate at home otherwise I would have made it myself a long time ago. Now, it is very rare that you will see me cook with mushrooms. I just have never liked them. I'm weird, I know. However, I do appreciate a good portabello or shiitake once in a blue moon so a while back I had picked up some dried wild mushrooms at TJs. This was the perfect time to use them up. The mushrooms provide a wonderful earthiness to this dish and are really a key ingredient so if you're like me and think you don't like them, I urge you not to skip them if you try this. The meat adds a nice sweet contrast and this is full of enough vegetables to not make you feel guilty. So...what's the next Korean dish I should try?


Japchae with Beef Bulgogi
(Japchae adapted from Whisk the Pantry)


Makes 2-3 servings

Canola oil
1 medium carrot, peeled with a vegetable peeler
1/2 small onion, thinly sliced
1 baby bok choy, sliced
3 green onions, sliced on a bias into 1-inch pieces
Small handful dried wild mushrooms, soaked for 15-20 minutes
1/2 bunch of cellophane noodles
2-3 tablespoons soy sauce
1 teaspoon sesame oil
Bulgogi beef

Bring water to a boil in a large pot. Add in the noodles. Cook for 5-8 minutes, or until they have softened. Drain and set aside.

While the noodles are cooking, heat a bit of oil in another large frying plan; saute onion until golden brown. Add in the carrot, bok choy, green onions and the mushrooms, stir and cook for another 5 minutes. When the vegetables have softened, add the noodles and the beef. Cook for another 2 minutes. Add in the soy sauce and sesame oil, stir and toss to combine.


Printable Recipe

Stumble Upon Toolbar

Friday, March 19, 2010

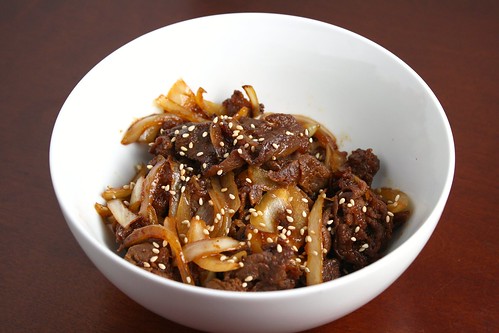
Beef Bulgogi

Beef Bulgogi


Why, yes, I did just make chicken bulgogi and I have done an easy beef bulgogi before, but I have had bulgogi on the mind lately. While at the Korean market a few weeks ago, I picked up some amazingly thin slices of beef and froze them for a later time. I couldn't stop thinking about them and when I came across another recipe using the bulgogi, I couldn't pass it up. Once again this was so simple and I was able to use some of the ingredients I purchased a few weeks ago for the chicken bulgogi. In particular, the gochujang was easy to add to this and once again provided that sweet and spicy bite that I crave in food like this. I had a real reason for making more bulgogi and I'll share it with you soon.


Beef Bulgogi
(Adapted from Savory Sweet Life)


Makes 2-3 servings

3 tablespoons soy sauce
1 1/2 tablepoons white sugar
1 1/2 teaspoons sesame oil
1/2 of a small yellow onion, halved and sliced
1 teaspoon gochujang
Canola oil for cooking
1/2 pound thinly sliced rib-eye or Angus beef*

*You can find thinly sliced beef at an Asian market. If you don't have access to one, place the beef in the freezer for about 20 minutes before slicing and then cut against the grain.

Whisk all the ingredients together in a medium bowl except beef and onions. When most of the sugar has dissolved, add beef and onion slices to the bowl and massage the marinade with your hands into each slice of beef. Cover and refrigerate for 1 hour. Pan fry, place a few slices of beef in single layers and completely flat on a hot oiled frying pan and fry each side until cooked. Make sure not to overcrowd the pan. You will probably need to do this in batches. Serve warm over rice or noodles.

Printable Recipe

Stumble Upon Toolbar

Thursday, March 18, 2010

Spring Recipe Ideas

Can you believe it's almost spring? I feel like the winter just flew by. Despite the rainier and colder than normal winter we had here in Southern California, I feel like I didn't see any of it. Especially since it's been 85+ degrees for the past few days. What rain? I am so excited to check out the farmers market this weekend and see what the rain has produced. Here are some ideas for you to use up some of your spring bounty.

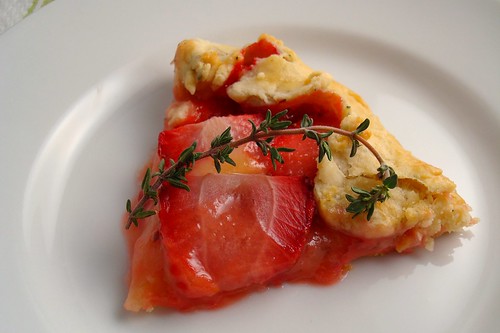
Strawberry Galette with Lemon Curd in a Thyme Crust. I love the way this simple free-form pie bridges the gap between spring and summer. Plus it is a wonderful way to use up a lot of lemons. Last month I got a surplus of Meyer lemons from Mary and as of yesterday, I have a surplus of regular lemons from Raul. I already have something delicious planned for the new crop so stay tuned

Strawberry Galette Slice

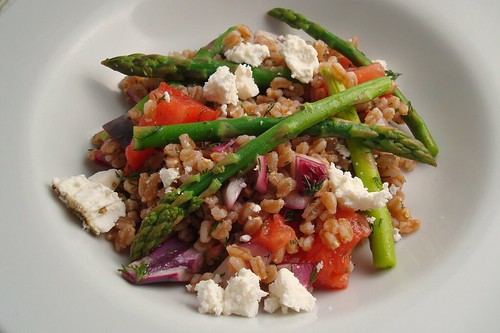
When it's warmer out, you definitely feel like eating lighter. I love this farro salad with asparagus and tomatoes because it's filling, yet light. I really think farro has replaced quinoa as my favorite grain.

Farro Salad with Asparagus, Tomatoes, and Feta

I've been writing this blog for a while. If you've been reading for a while then you know I love asparagus. Like pink, puffy, giant heart love it. It smells funny, but it's beautiful and I really think I could eat it all day. I have many, many recipes featuring asparagus. I think my favorite of all of them is the springtime cianfotta featuring many bright, green, crisp vegetables. I'm pretty sure I could eat a bowl of this all day long.

Spring Cianfotta

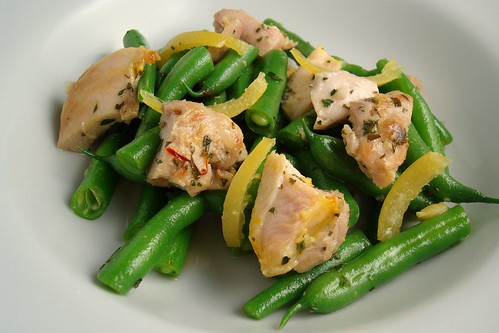
Green beans are also at their peak in the spring time. Try them with a boiled lemon and some chicken breast. Believe me when I say, it's not as strange as it sounds.

Saffron Chicken, Boiled Lemon and Green Bean Salad

Fresh peas are so wonderful and sweet and bright. Pair them with eggs and bacon for a hearty, yet light in feel breakfast or lunch!

Peas with Bacon and Eggs


Spring is when those adorable Girl Scouts come knocking at your door (or accost you at the grocery store) selling their addictive treats. Being a former Girl Scout myself, I find it hard to resist their wares. So naturally, I had to turn them into a delicious treat.


Samoas Ice Cream

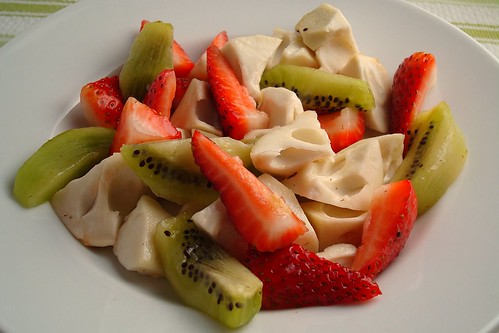
Sometimes a simple dessert doesn't have to be baked (or churned). Check out this medley of spring fruits and I promise, you will not be reaching for the cookies after trying this simple treat.

Cherimoya, Kiwi, and Strawberry Salad

Obviously, these are just a few ideas to get you thinking about the warm weather and sunny(ier) skies yet to come.

Stumble Upon Toolbar

Tuesday, March 16, 2010

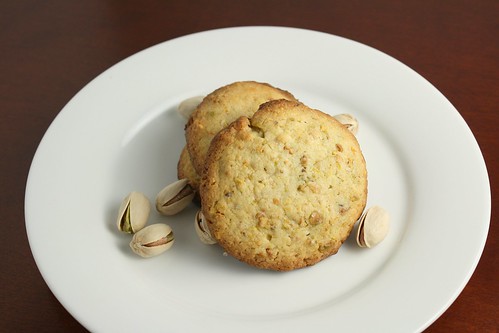
Meyer Lemon and Pistachio Cookies

Meyer Lemon and Pistachio Cookies

The Stir It 28 event a few weeks ago was a great success. We made about $5000 for Haiti relief and we had a great time. You know how we're always commenting on each other's blogs saying how we want to try what the other is making? Well, this was like the real live version of that. There were so many cool people and I had a blast. Of course, I have to give a special shout out to Chrystal for organizing the LA event and Greg for lending us his beautiful home (and kitchen). My dessert contribution were these cookies. Last month, Mary gave me a huge bag of Meyer lemons from her dad's tree. LA food bloggers are the coolest! These cookies are so easy to make. There is a nice crunch from pistachios, a hint of tartness with the lemon and a hint of saltiness from the salt sprinkled on top. They smell really good while baking too. I'm pretty sure people liked them and it was a good way to use up some of my Meyer lemon bounty!


Meyer Lemon and Pistachio Cookies
(Adapted from 5 Second Rule)


Makes about 30 cookies

4 ounces roasted pistachios, ground until almost powdery (it is ok to have some chunks)
1-1/2 cups all-purpose flour
Pinch salt
2 sticks (8 ounces) unsalted butter, at room temperature
1 cup minus 1 tablespoon granulated sugar
1/4 cup Meyer lemon zest
2 egg yolks
Coarse sea salt for finishing

In a medium bowl, whisk the pistachios with the flour and salt.

In the bowl of an electric mixer fitted with the paddle attachment, beat the butter, sugar, and lemon zest until light and fluffy, about three minutes on high speed. Beat in yolks. Turn off mixer, dump in flour mixture, then beat on low speed for just a few seconds, or until the dry ingredients are absorbed. Refrigerate dough for one hour.

Preheat oven to 375 degrees. Line baking sheets with parchment .

Use a 1-1/2-inch scoop to portion out the dough, placing 12 to a sheet. Sprinkle each dough mound very lightly with coarse salt. Bake for 13 to 15 minutes, reversing the position of the baking pans halfway through bake time. Cookies are done when the centers are set and the edges are nicely browned.

Cool on a rack, and store airtight. container.

Printable Recipe

Stumble Upon Toolbar

Sunday, March 14, 2010

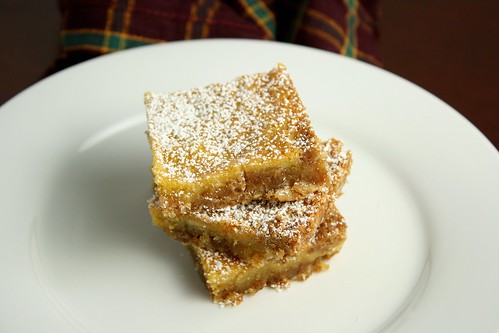
Momofuku's Crack Pie

Momofuku Crack Pie Bars

It's "Pi Day"! Normally, I don't give a hoot about such things, but this year there was a recipe I had been wanting to try for a while and so I figured this was the perfect time to make it. A lot of people have been posting this recipe lately. Now I completely understand why. I've never been to Momofuku, but I was intrigued when I heard of their "crack pie". Mostly because I thought the name was so funny. I was also surprised that they would charge $44 for a pie. I made this in the comfort of my home for a fraction of the cost of the store's version and I think it came out pretty well. I baked this in my 9-inch square pan and cut it into bars. The cookie takes less time to bake than what was called for and the pie itself took more time, but otherwise, this went off without any problems. I'm convinced that the cookie crust is what makes this dessert so "crack-like". This is sweeter than desserts I normally enjoy, but if you feel like splurging, this is certainly the way to go.


Momofuku's Crack Pie Bars


Momofuku's Crack Pie


As found in the LA Times, adapted from Momofuku Milk Bar in NYC

Makes 1 9-inch pie

Cookie for crust:
1/3 cup plus 1/2 teaspoon flour
Pinch baking powder
Pinch baking soda
1/8 teaspoon salt
4 tablespoons softened butter
3 tablespoons brown sugar
1 1/2 tablespoons sugar
1/2 of a lightly beaten egg
Scant 1/2 cup rolled oats

Crust:
Crumbled cookie for crust
2 tablespoons butter
2 teaspoons brown sugar
Pinch salt

Filling:
3/4 cup white sugar
7 1/2 tablespoons (3.5 ounces) light brown sugar
1/8 teaspoon salt
3 tablespoons plus 1/2 teaspoon milk powder
1 stick butter, melted and cooled
1/4 cup plus 3 tablespoons heavy cream
1/2 teaspoon vanilla extract
4 egg yolks
1 prepared crust
Powdered sugar, garnish

To Make the Cookie:
Heat the oven to 375 degrees.

In a medium bowl, sift together the flour, baking powder, baking soda and salt.

In the bowl of a stand mixer using the paddle attachment, or in a large bowl using an electric mixer, beat the butter, brown sugar and sugar until light and fluffy.

Whisk the egg into the butter mixture until fully incorporated.

With the mixer running, beat in the flour mixture, a little at a time, until fully combined. Stir in the oats until incorporated.

Spread the mixture onto a greased baking sheet and bake until golden brown and set, about 10-15 minutes. Remove from heat and cool to the touch on a rack. Crumble the cooled cookie to use in the crust.

To Make the crust:
Combine the crumbled cookie, butter, brown sugar and salt in a food processor and pulse until evenly combined and blended (a little of the mixture clumped between your fingers should hold together). Press the crust into the pie tin to form a thin, even layer along the bottom and sides of the tins. Set the prepared crusts aside while you prepare the filling.

Filling and assembly:
Heat the oven to 350 degrees.

In a large bowl, whisk together the sugar, brown sugar, salt and milk powder. Whisk in the melted butter, then whisk in the heavy cream and vanilla.

Gently whisk in the egg yolks, being careful not to add too much air.

Spread the filling over the prepared pie shell.

Bake the pie for 15 minutes, then reduce the heat to 325 degrees and bake until the filling is slightly jiggly and golden brown (similar to a pecan pie), about 15-20 minutes. Remove the pie and cool on a rack.

Refrigerate the cooled pie until well chilled. The pie is meant to be served cold, and the filling will be gooey. Dust with powdered sugar before serving.

Printable Recipe

Stumble Upon Toolbar

Friday, March 12, 2010

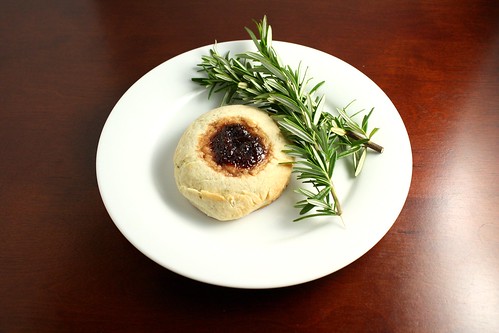
Strawberry and Rosemary Scones

Strawberry Rosemary Scones

Short post today. A couple weeks ago, I saw Giada make these scones. So I wanted to make these scones. I love the combination of savory rosemary with sweet strawberry jam (my favorite is from Harry's Berries). To make life easier, I made them in the food processor. They came out more like cookies, but still delicious. They were even better the next day after spending the night in an airtight container and they go really well with green tea.


Strawberry and Rosemary Scones
(Adapted from Giada de Laurentiis)


Makes 5-6 scones

1 cup all-purpose flour, plus more for dusting
1/4 cup sugar
1 teaspoon baking powder
1 1/2 teaspoons finely chopped fresh rosemary leaves
1/8 teaspoon fine sea salt
3 tablespoons unsalted butter, cut into 1/2-inch pieces
1/2 cup heavy cream
Strawberry jam

Place an oven rack in the middle of the oven. Preheat the oven to 375 degrees. Line a baking sheet with a silpat or parchment paper. Set aside.

In the bowl of a food processor, pulse together the flour, sugar, baking powder, rosemary, salt, and butter until the mixture resembles a coarse meal.

Transfer the mixture to a medium bowl. Gradually stir in the cream until the mixture forms a dough. On a lightly floured work surface, roll out the dough until it's 1/2-inch thick.

Using a 3-inch cookie cutter, cut out pieces of dough and put on the prepared baking sheet. Gently knead together any leftover pieces of dough and roll out to 1/2-inch thick. Cut the dough into more circles and add to the baking sheet.

Using an index finger or a small, round measuring spoon, gently make an indentation in the center of each pastry heart. Spoon a heaped 1/2 teaspoon of jam into each indentation.

Bake for 18 to 20 minutes or until the edges are golden brown. Transfer the cooked scones onto a wire rack and cool for 30 minutes.

Printable Recipe

Stumble Upon Toolbar